Olives, Olives, Olives
This autumn was a great season for olive foraging in Auckland. Big fat black ones all around. They like a cool, wet winter and a warm, dry summer, which they got. What better time than now to learn how to pick and cure them?
My flatmate Jenny did it a few years ago and told me where to find decent trees on public land, so the girlfriend and i went there to that secret location one afternoon in early April.
We brought an apple picker to help us reach high into the trees, and that worked somewhat, but handpicking with a ladder would have been more effective. Then on our ride home, we spotted even bigger olives on private land and received the owner's permission to pick those too. We even found an abandoned shopping cart nearby to stand on. What luck!
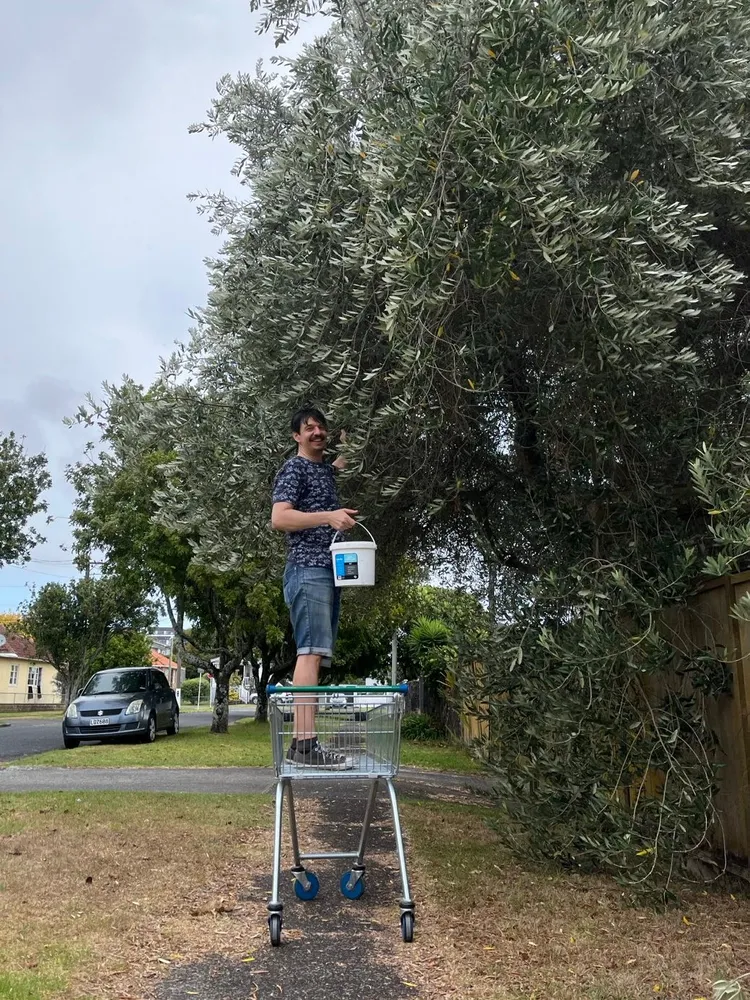
And what a harvest! We picked 4.8 kg and could've picked more but decided that was enough for our first go at this game.

Now what to do with all these olives? Well, fresh olives taste disgusting. Try one. You need to drain or decompose their bitter juices before you can enjoy them, and humans have discovered at least three ways to do this, namely, cure them in lye, cure them in brine, or cure them in salt. I chose salt, because that method yields tastier results than brine, at least to my mouth, and because the lye method works best on green olives, and ours are black. Here's the method in detail, thanks to the Internet.
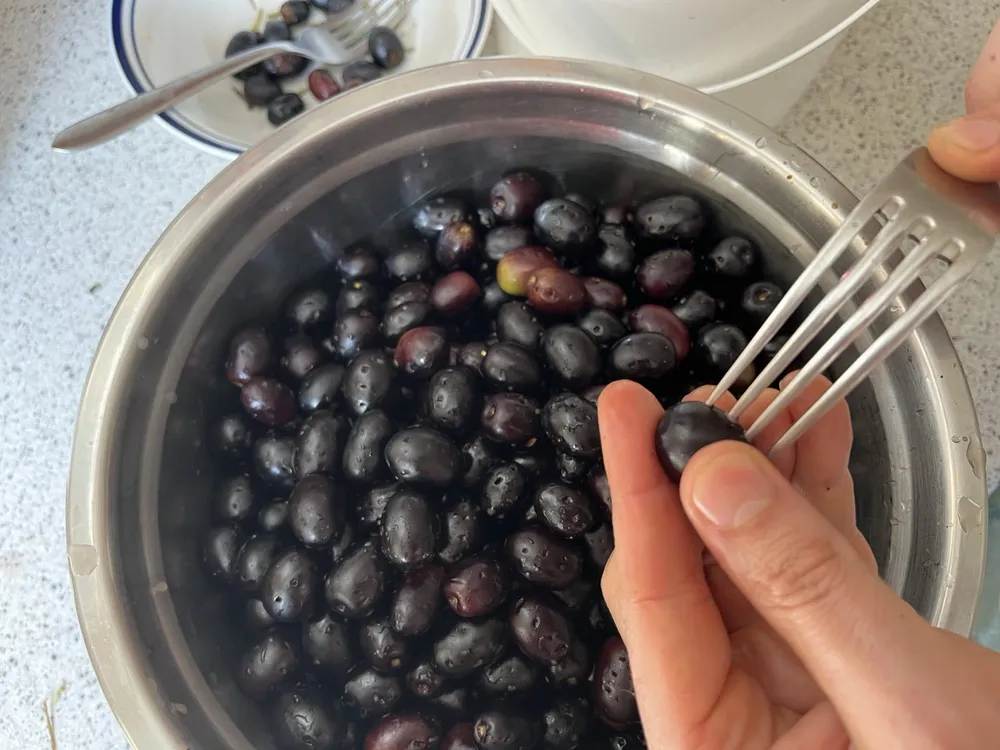
Step 1 for salt curing olives. Rinse the olives, drain them, discard the damaged ones, de-stem the remaining ones, and prick each one twice with a fork. Pricking kilograms of olives can tire your hands, so take it easy or recruit some friends to help.
Step 2. Thoroughly mix the olives with half their weight in chunky salt, then put the mix into undyed, cotton pillow sacks, splitting into batches of at most 5 kg, say, so you don't hurt yourself. Don't use fine salt, by the way, because the olives will absorb too much of that stuff and also cleaning them will be harder at the end.
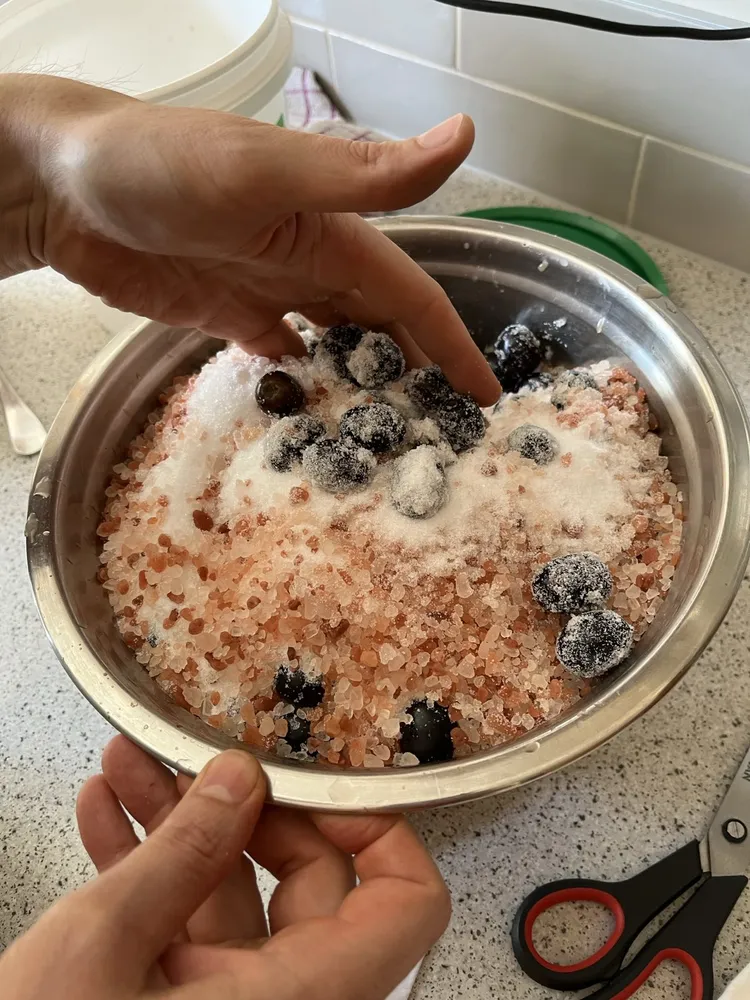
I said don't use fine salt! Oh well, live and learn.
We got our pillow sacks from the op shop.
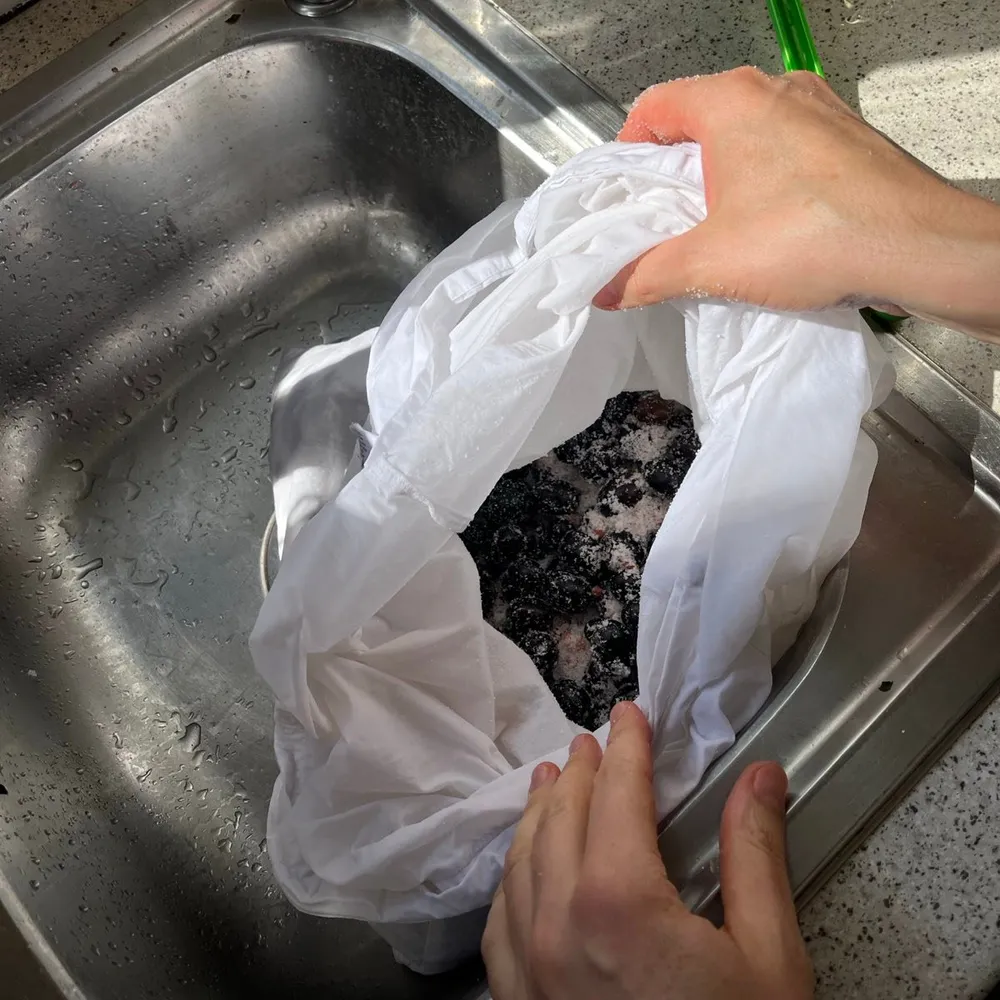
In a cool, dry, dark place, hang the sacks, placing bowls or buckets under them, lest you stain the floor as the salt leaches out the olives' bitter juices. Shake up the sacks weekly to ensure the olives stay covered in salt.
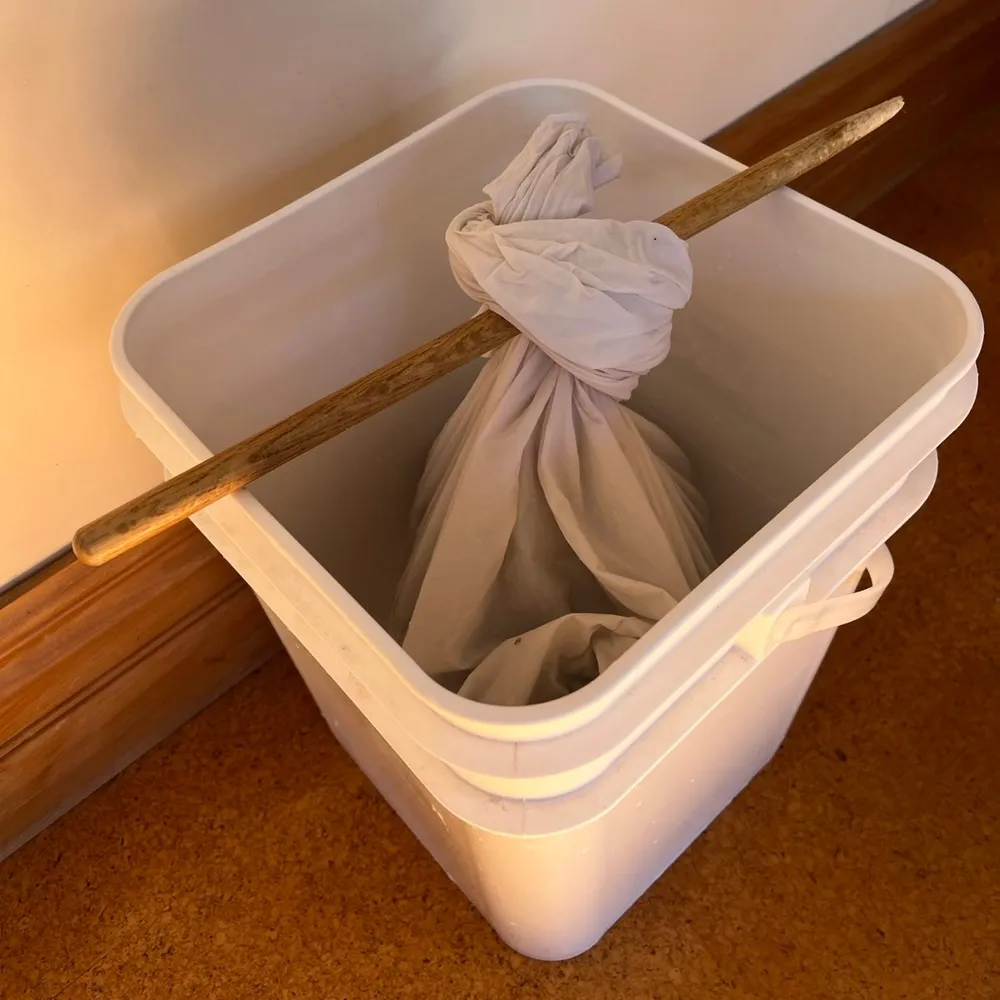
Not pictured here: i laid a lid atop this bucket to keep the olives in the dark.
Step three. After three weeks, remove an olive from the sack, rinse it, and eat it. It should taste mildly bitter but pleasant. If not, then continue to cure the olives for another week and repeat until they taste good.
Step four. When the olives taste good —ours were ready in three weeks— take them out of their sacks and brush the salt off them or quickly rinse them with water. In the latter case, lay them afterwards in a single layer on a baking sheet or better yet, on mesh, and let them dry completely, which can take several hours.
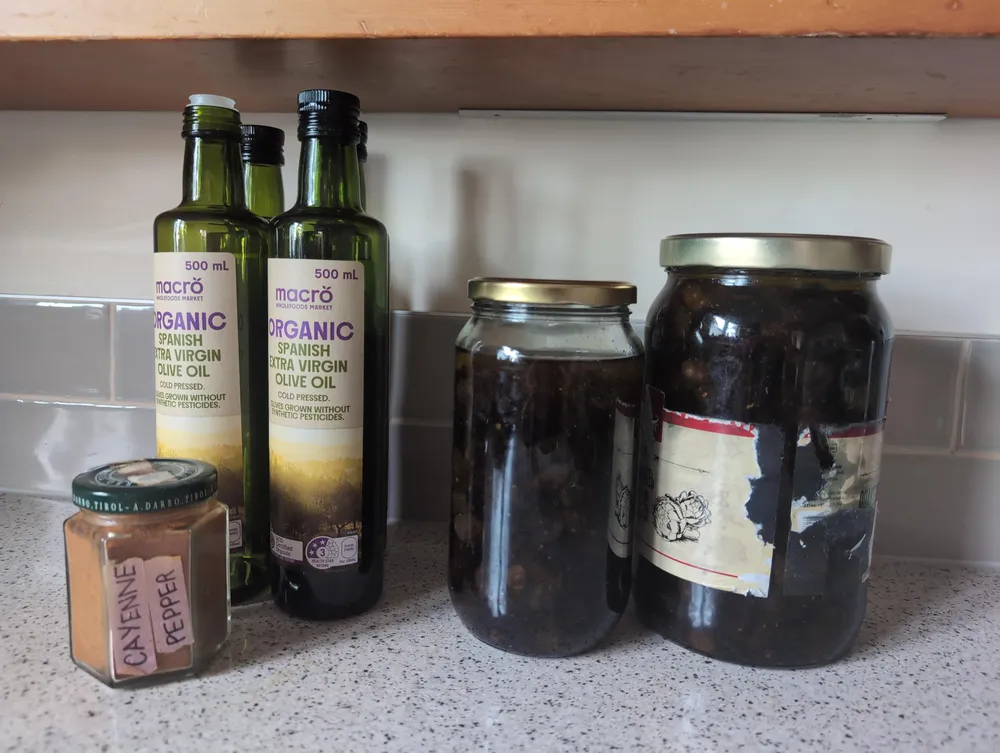
Step five. Pack the olives in sterilized glass jars, completely cover them with olive oil, and seal. Optionally mix in some dried chili/thyme/garlic.
Let sit for 24 hours so the olives plump up, then crack open a jar and feast.
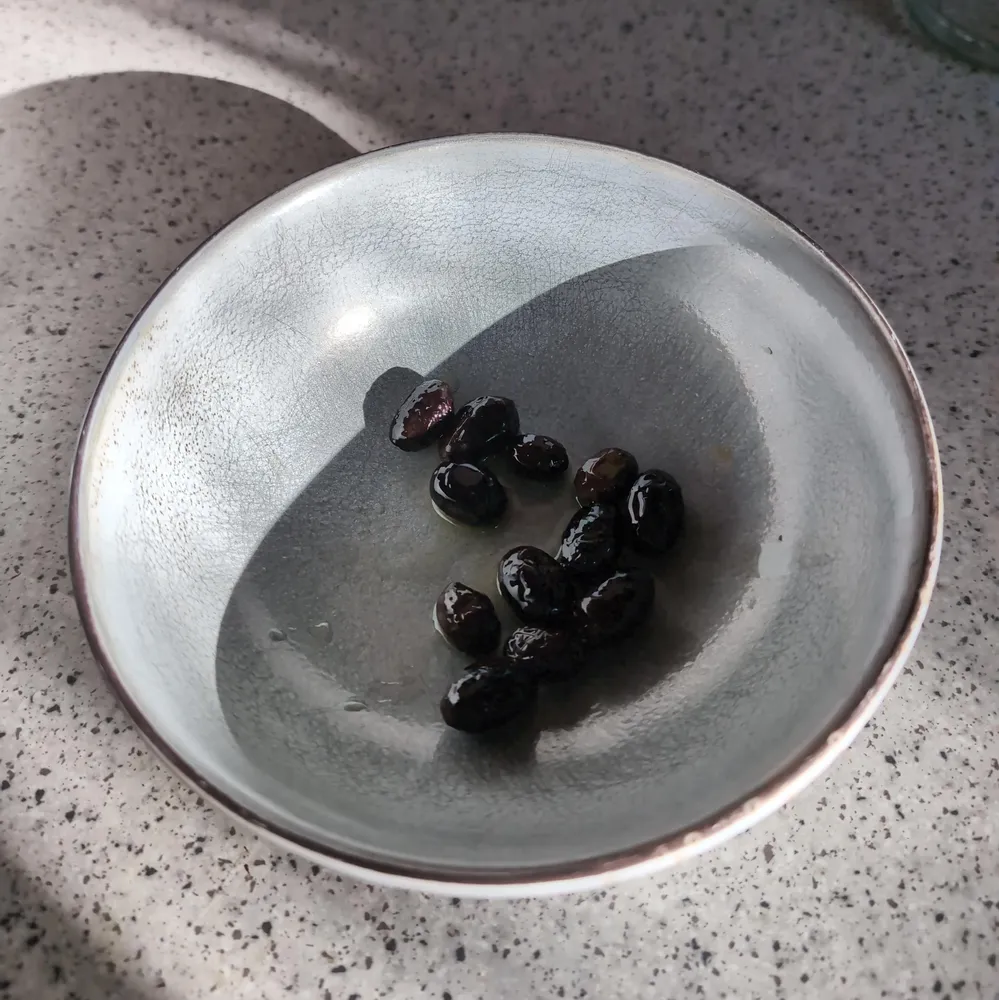
So good and so salty. Drink plenty of water with these!
Store the remainder (completely covered in oil) in a cool, dark place for up to six months or in a refrigerator for up to twelve months. You know you've stored them too long if they smell rancid. After you finish the olives, reuse the olive oil for salads, cooking, etc.
Alternatively, if you don't want to use that much olive oil, store the olives mixed with an eighth of their weight in fine salt in an airtight container in the refrigerator. When you want to eat some, boil them in water for a few seconds to remove the excess salt, then marinate them in olive oil and optional herbs for 24 hours. Once marinated, eat them within a week.
Delicious.