Frankenstein's Bread Table
Our cheap chipboard bread table did the job. I didn't have to make a new one, but i was still fascinated by woodwork and looking for an excuse to build a drawer.
Over on Trade Me i found a mahogany dresser of correct bread table length and depth that was also missing two drawers.
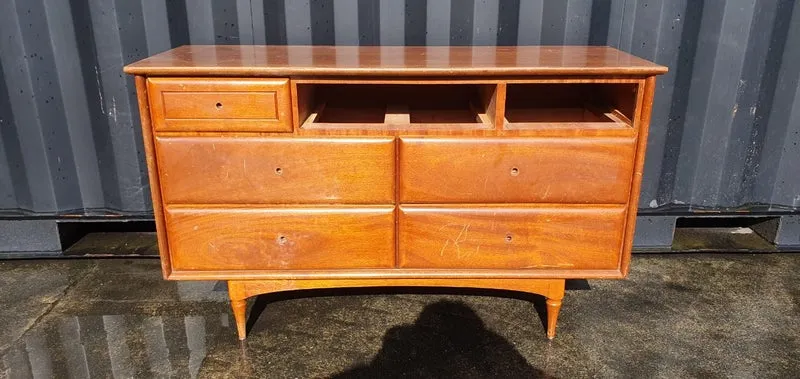
Perfect. And since the dresser was missing two drawers, it only cost 45$. Deal. I bought it and cut off its top level.
Then i removed the varnish with a hand plane, a big mistake (which i forgot to photograph.) Genuine mahogany planes well says the Internet, but this wood kept tearing out no matter how carefully i planed. Turns out the wood has interlocking grain, which makes it not genuine mahogany and probably African mahogany or African walnut, which is much better sanded than planed. Darn, live, learn, and accept that you can't sand out all your mistakes.
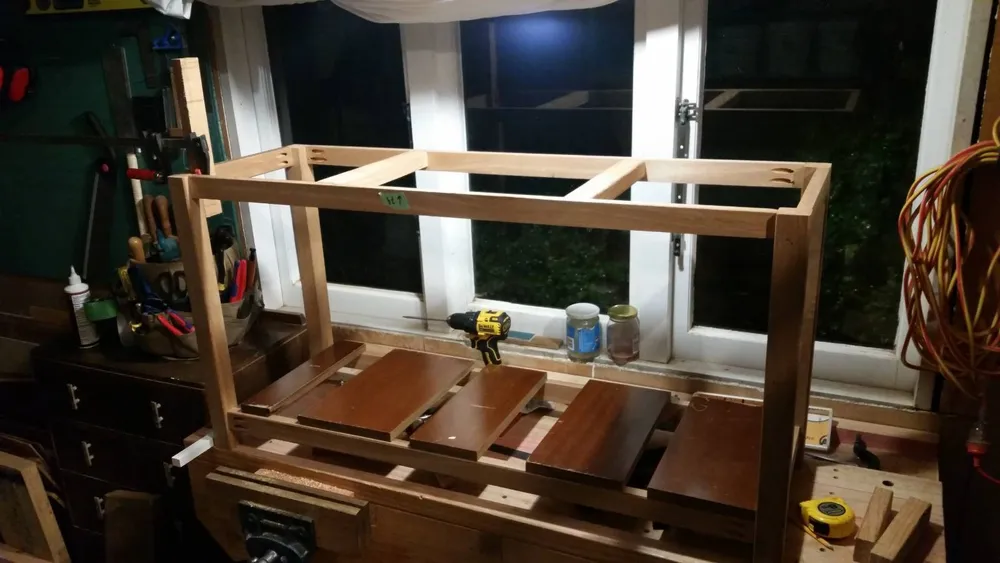
Carrying on in Frankenstein fashion, i built a frame to support the drawer section out of a totally different wood, a lovely kauri-like something that i salvaged from a berm-side bed frame.
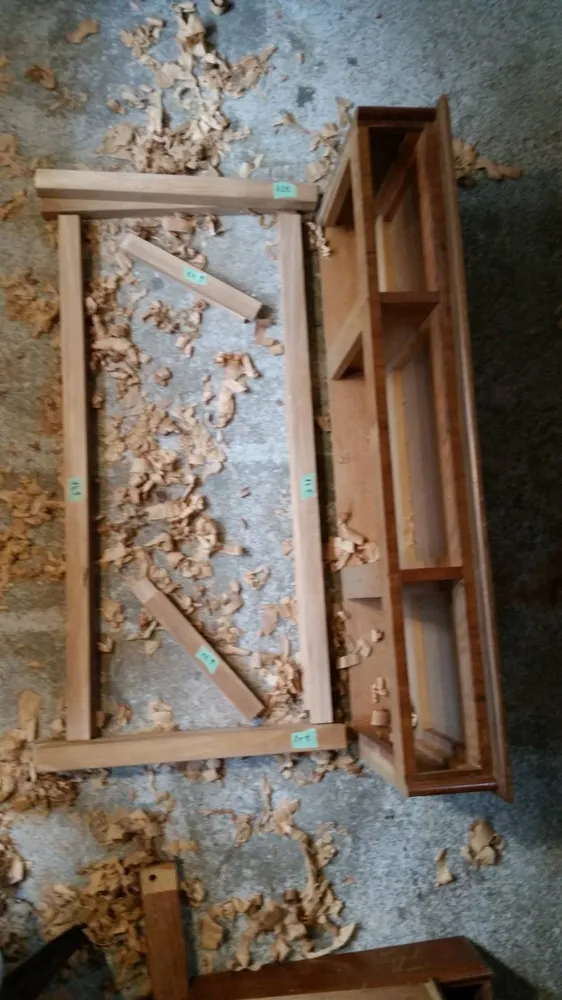
What is that wood? It seems the same density and hardness as kauri but is a touch pinker and oxidises much faster.
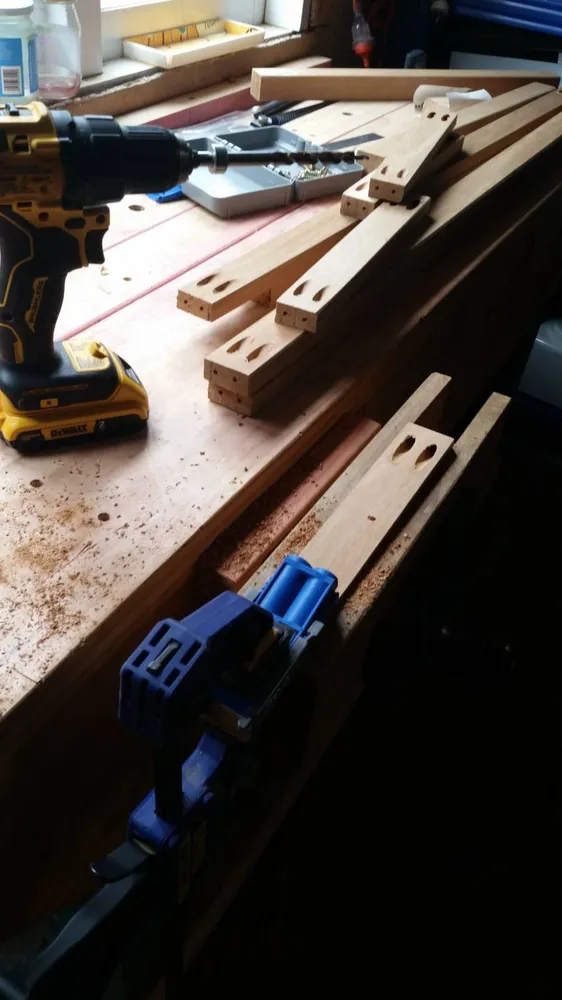
I modeled the frame after our current bread table and used pocket hole joinery again. Bought my own jig this time around.
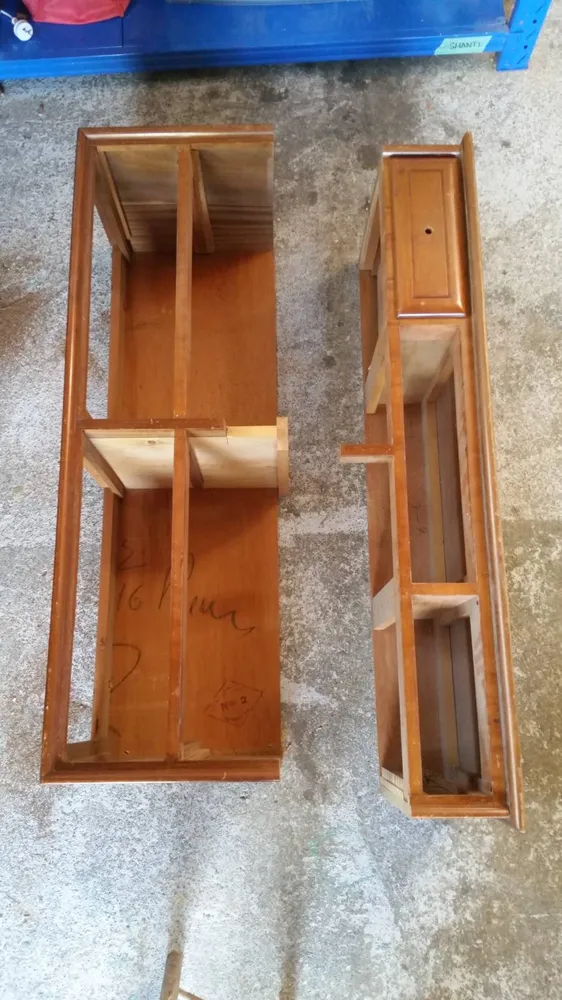
From the dresser side panels, i cut bottom slats for a bottom shelf.
Then i disassembled and resized two of the dresser's lower-level drawers to fit the two vacant spaces in the top level, using the one extant top drawer as a template.
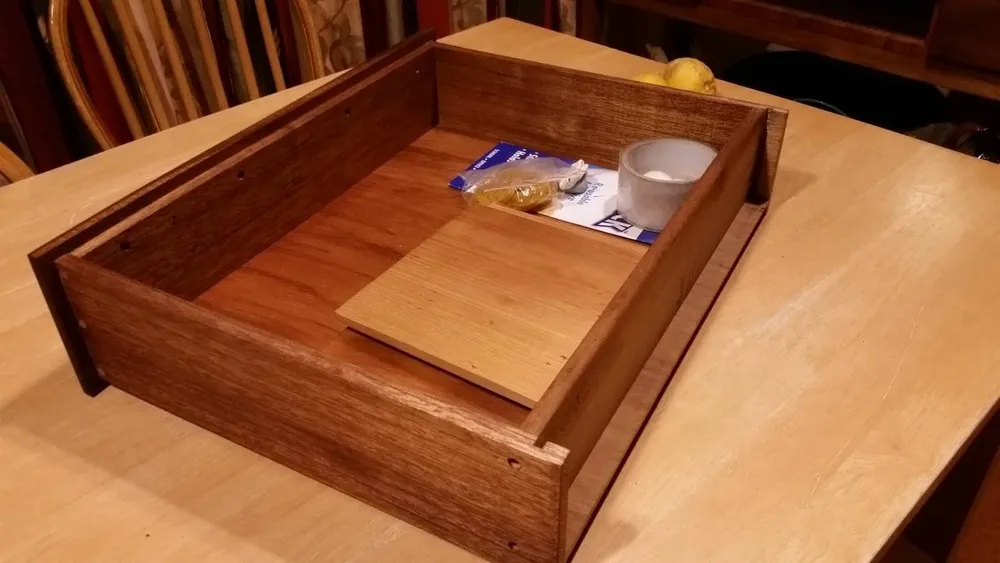
I decided against replicating the original dovetail joints as too tedious. Pinned rabbet joints take much less time to make and look almost as pretty. But i couldn't use those joints here, because the panels were too thin, so i just used screws and plugged up the front-most ones for good looks.

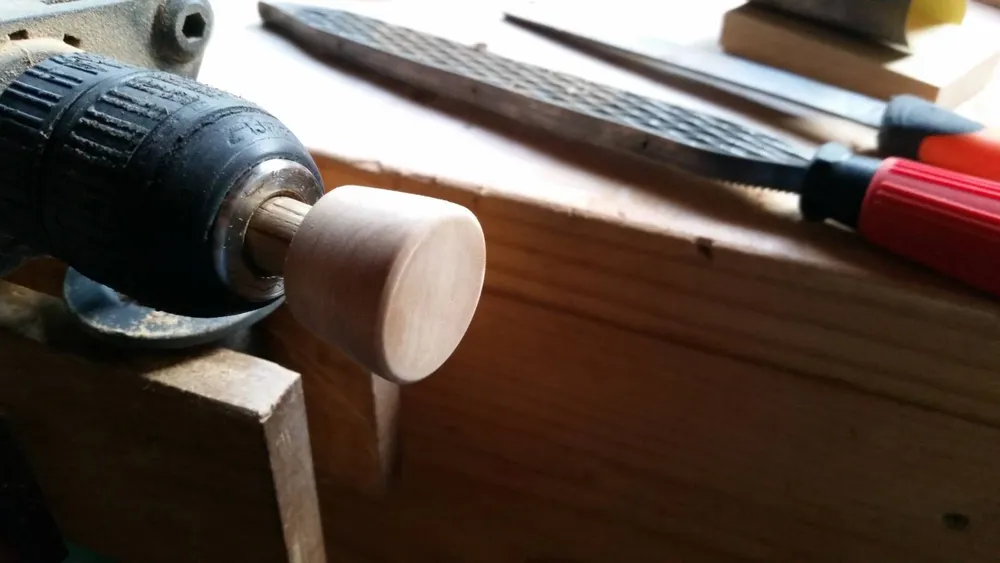
Then with a rasp and sand paper i turned handles out of the kauri-like wood on my tiny ersatz lathe, that is, a corded power drill with a taped down trigger.
Finally, i screwed the drawer section to the frame and finished the whole piece with three coats of equal parts polyurethane, mineral spirit, and boiled linseed oil followed by a final layer of buffed-on paste wax made of beeswax and linseed oil. That brought out the beautiful grains and colors of the woods and left a protective matte film.
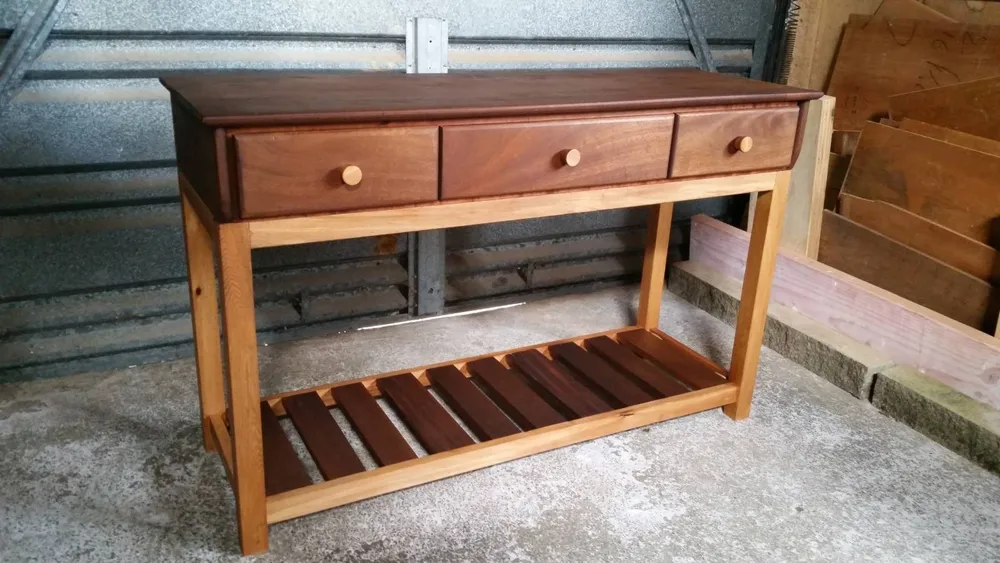
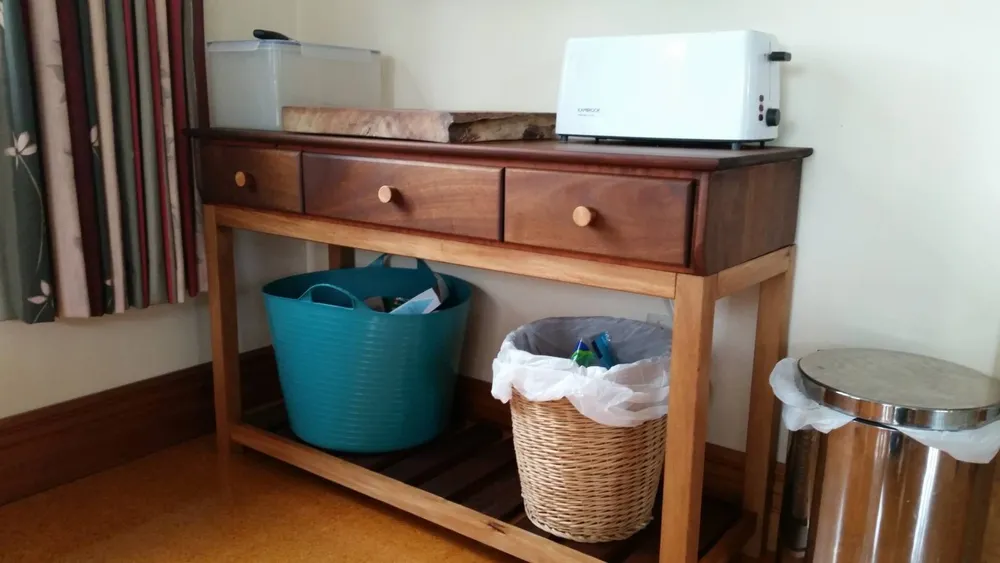
Project complete, after about 45 hours of work. Maybe next time i'll learn how to build a drawer cabinet. In the meantime, i'll file away these lessons learned:
- Double check the appropriateness of the design dimensions before building the project. Will a broom really fit under the bottom shelf? Turns out it won't. This is what happens when my girlfriend isn't around to quality control my plans.
- Ensure that the two inside faces of every table leg (in addition to the two ends) are square before connecting an apron. Otherwise the whole assembly probably won't turn out square.
- Don't plane African mahogany, African walnut, or any other wood that has interlocking grain, because it will probably tear out big time. Sand it instead.