Fermentation Station
Yogurt, kefir (two kinds), sourdough, sauerkraut, feijoa fizz: we ferment a lot at home. But where to put all the fermenting vessels in and out of action?
Girlfriend: Is that the kraut crock bubbling in your bedroom?
Me: Maybe.
G: I think we need a fermentation station, a single place to put all the fermenting vessels in and out of action.
M: ...
G: If i design it, will you build it?
M: With my new YouTubular woodworking skills? Yes. Yes, i will. Deal.
She sketched a shelf sized to fit our crocks and the blank spot on our living room wall. It was open for a light look, doubly aproned for stability, and made of rimu and kauri to match our house's moldings.
I took the plans to the garage and rummaged through our salvaged wood. A few weeks later, breaking for meals and employment when appropriate, i came out with this, a mostly hand-tool build.
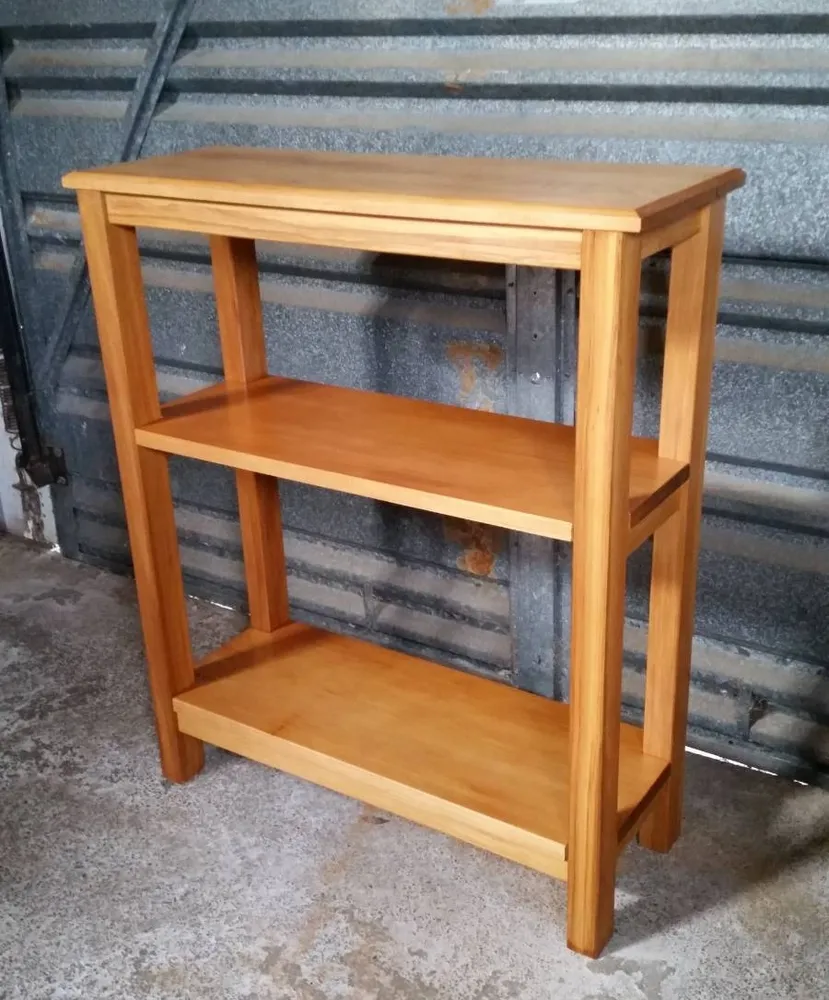
Not too shabby!
To join the aprons to the legs, i used the pocket-hole jig and screws my workmate lent me a while back to experiment with. Thanks, Shane! Traditionally, one would make mortise and tenon joints here, but i wasn't confident enough in my skills to try those. And i didn't have spare rimu to fall back on in case i messed up. So pocket holes it was. They hold strongly enough for this application, and you can't see them unless you look underneath the shelf:
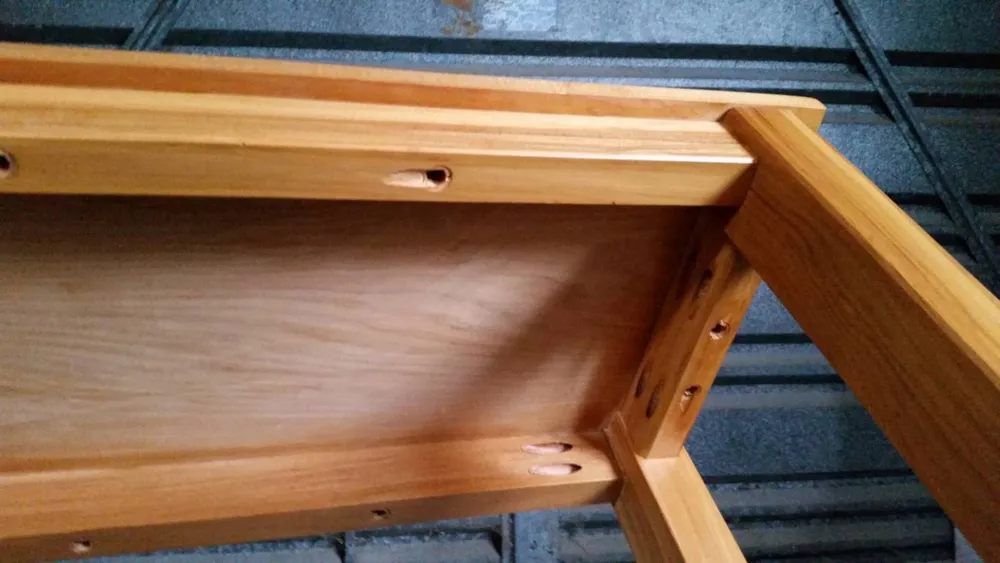
To attach the shelves to the aprons, i used washer-head screws threaded upwards through overly wide holes in the aprons, which allow the screws to move slightly when the shelves expand and contract with the seasons. I learned that trick from the Internet and my kitchen table.
For a hard-wearing finish, i applied a no-fuss polyurethane process, which turned out silky smooth.
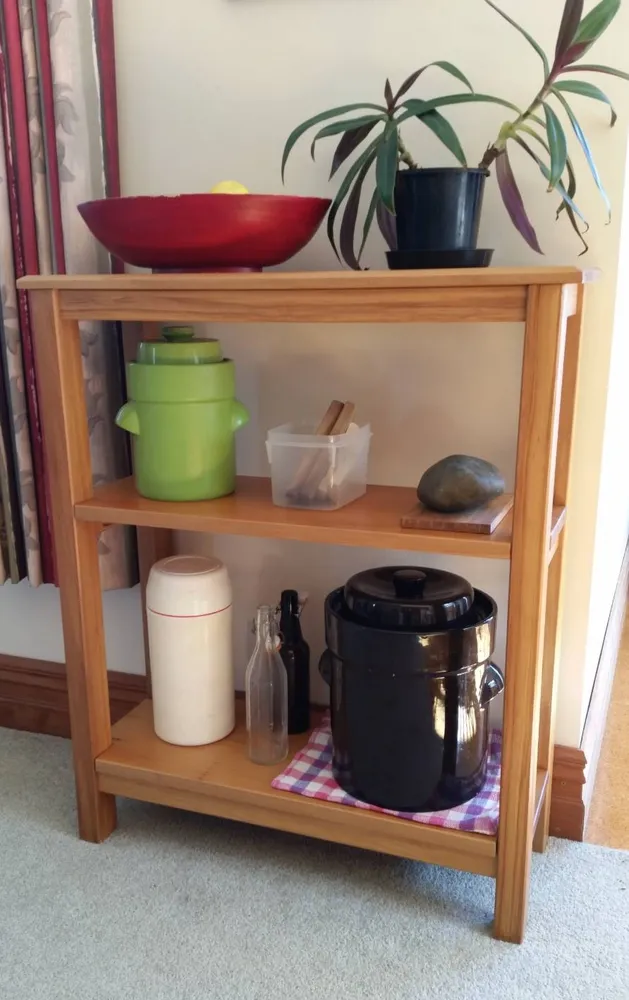
Here's the completed shelf in situ. I'm standing proud off camera with my overjoyed flatmates.
And that, ladies and gentlemen, is my first foray into fine furniture.
I give it a grade B for meeting the specification with straight lines, square angles, tidy cuts, and a lovely finish, but suffering from a few gaps where the shelves meet the legs, slight side overhangs, and some rough planing and sanding spots.
Lessons learned:
- Make dados (grooves) in the legs to line up and install the aprons much more easily.
- Err on the side of cutting away too little material than too much. Removing a smidgen later is easier than adding it.
- Don't sand polyurethane too hard between coats, because you'll permanently scratch the finish.
- Use rimu for the shelves and kauri for the legs, the reverse of what i did. That's because rimu is much harder than kauri (with a Janka hardness of 5.6 kN for rimu vs 3.2 kN for kauri), and shelves take more hits than legs. I actually knew this ahead of time but didn't have the right-sized timber to do it.
- Wood dust is worse than i thought. For example, rimu dust burns your nostrils, and oak and beech dust give you sino-nasal cancer. Yikes! I bought a better respirator and a vacuum cleaner for the shop.
Thanks to my girlfriend for suggesting and designing this project and encouraging me along the way. Now excuse me. I have some cabbage to chop.