Barrel Garden
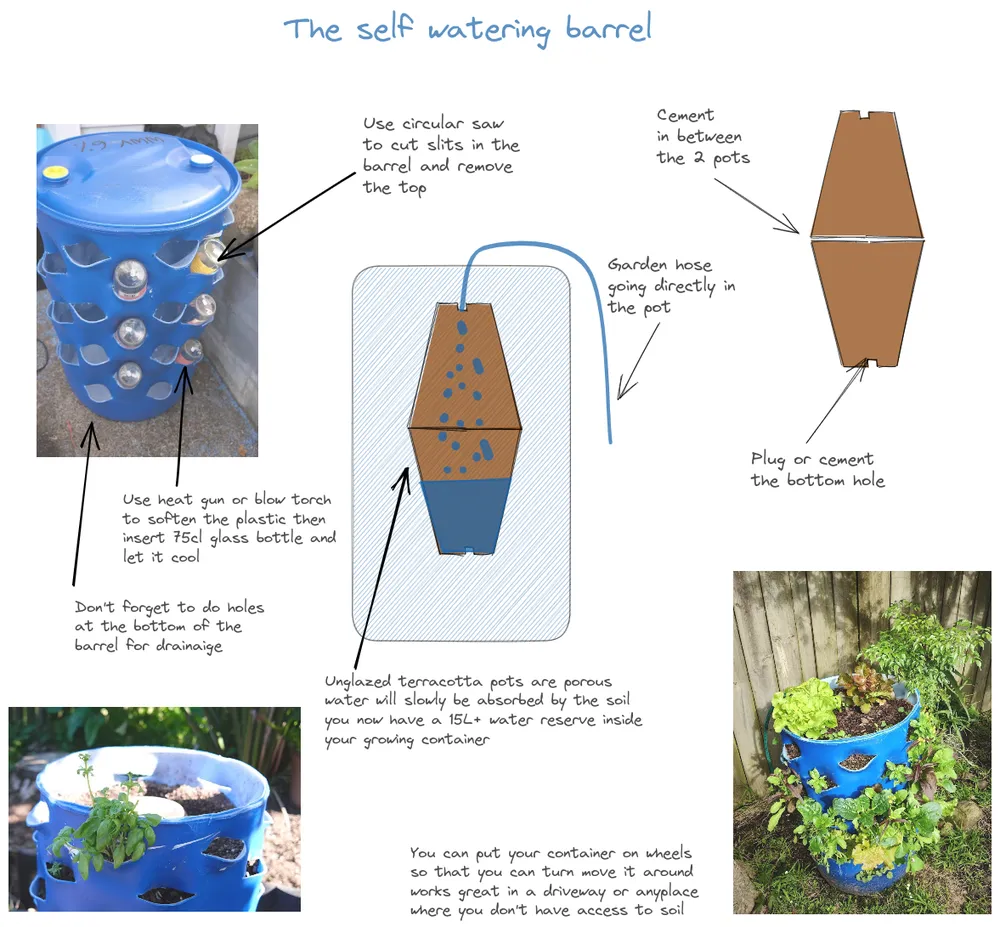
At the March Equinox party of the Aotearoa Permaculture Workshop, i reconnected with Benoit, and old permie acquaintance. He told me of his recent creation, a self-watering garden for tight spaces made from a second-hand food barrel. Intrigued, i asked him for his plans, which he later sent me in the form of this image.
Ingenious, i thought, and decided to build one myself to see if it worked as well as he said.
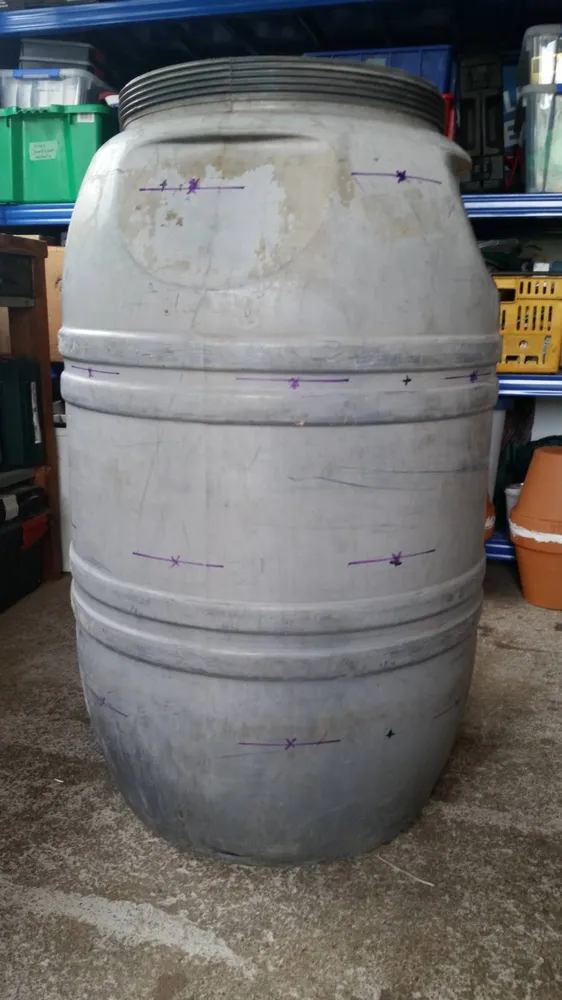
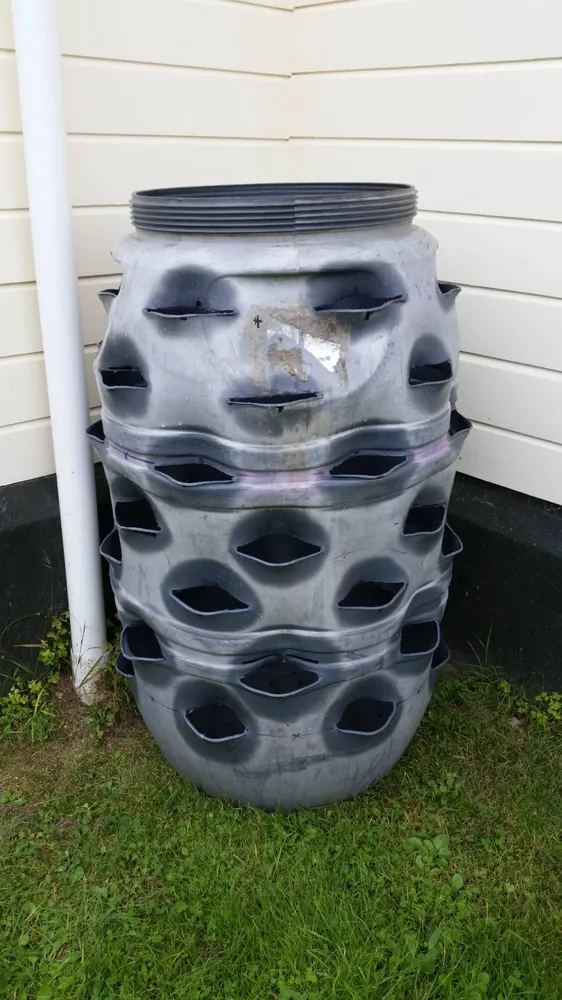
I started by buying a second-hand food-grade barrel for 50$. Mine had a screw top, which was easy to remove.
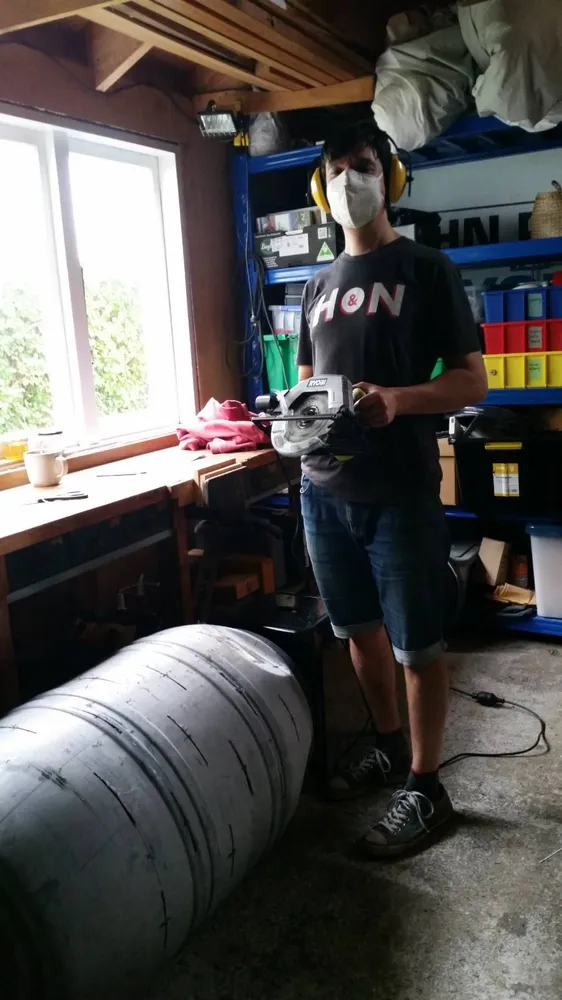
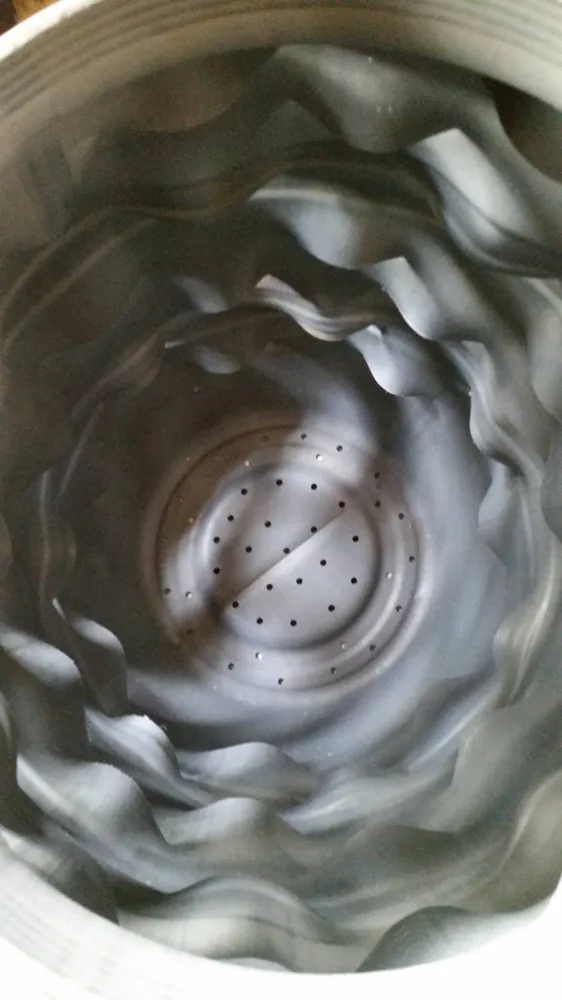
Then i borrowed Benoit's circular saw to cut the slits.
And his heat gun, to mold the pockets.
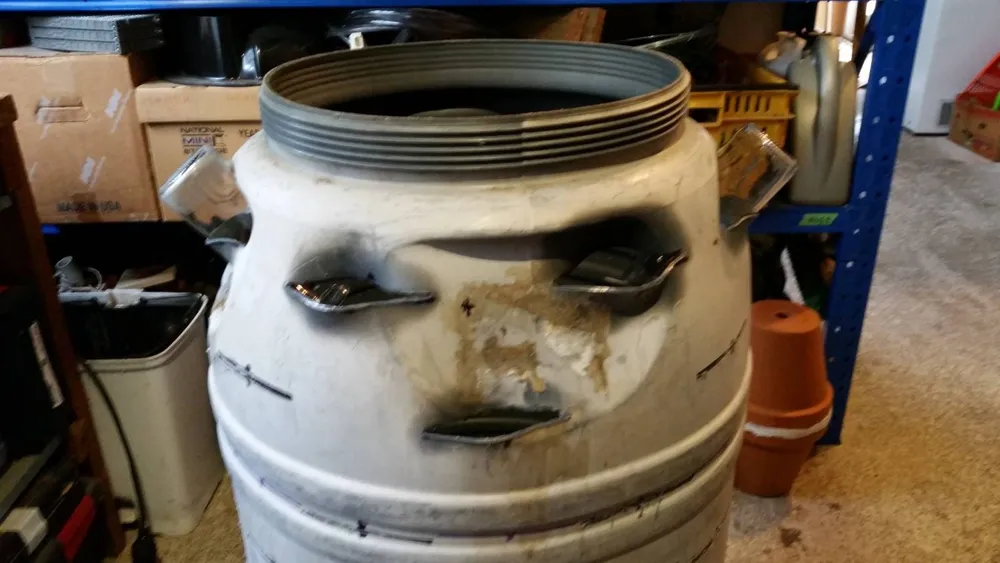
Pro tip: use at least three bottles so you can mold continuously, because it takes about five minutes for one pocket to set.
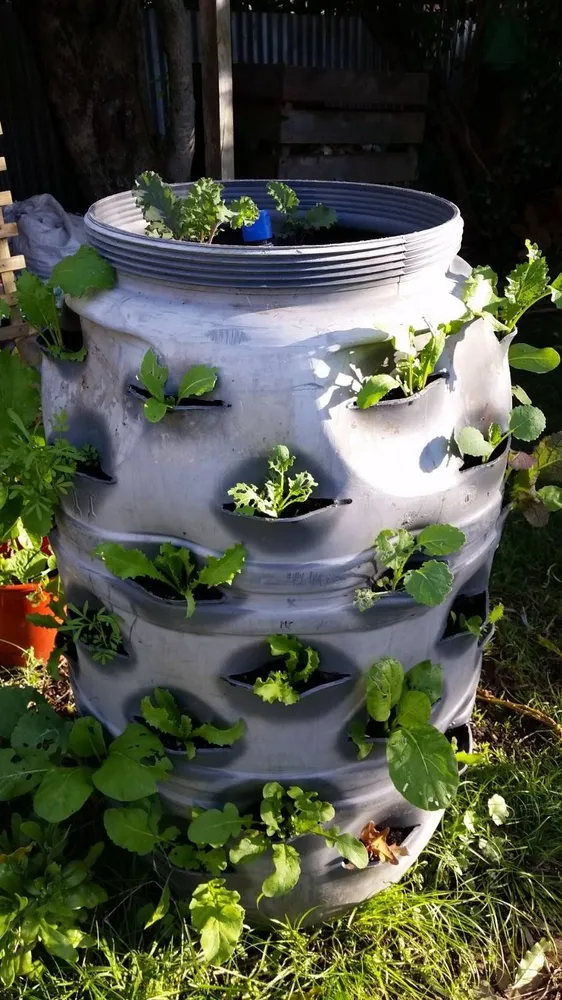
Then i drilled holes in the bottom for drainage.
Ugly but serene.
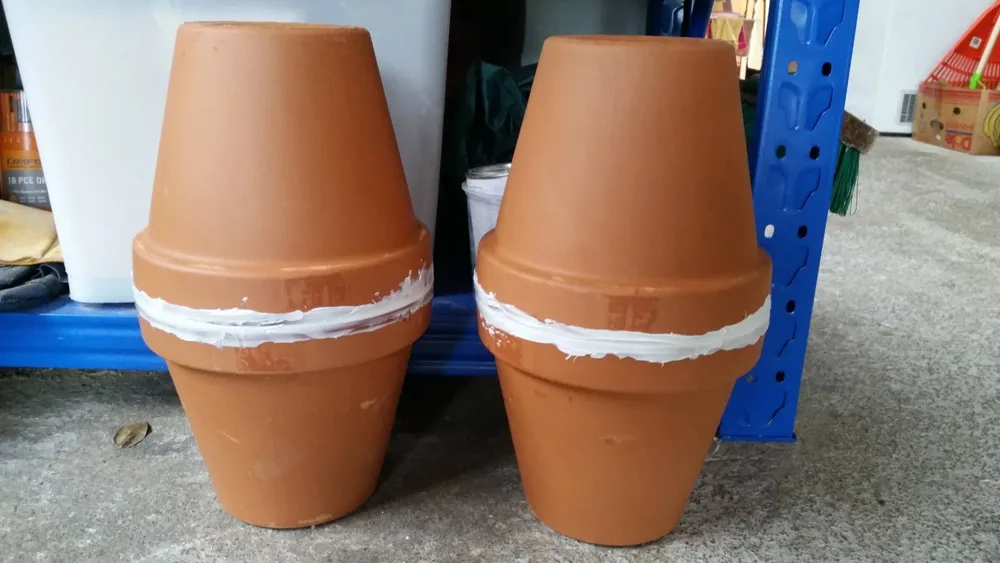
Next, i bought four 230mm-high terracotta pots for 28$ to make the permeable water reservoir, aka olla. I siliconed the pots together into one tall tank, then sealed the bottom hole of the bottom pot. Cement would probably have been more food safe. Mid-assembly pictured.
Next, i covered the bottom 100mm of the barrel with soil, gently installed the olla, and filled the rest of the barrel with soil, about 150 L of it (~32$).
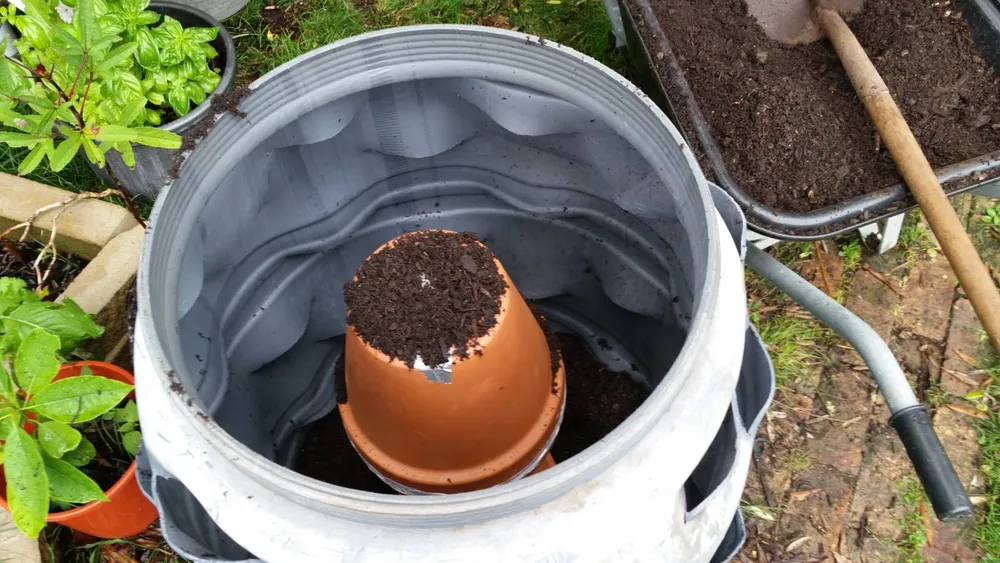
Then i attached a garden hose to the top of the olla and filled it up with rainwater, about 20 L of it.
Finally, after letting the soil sit for a week, i planted the garden with 55 seedlings of lettuce, pak choi, mustard, and kale. They grew, both day and night.
Four more weeks, and the plants will be ready for picking, i reckon. Salads ho!
What i like about this garden's design is (1) its decent capacity (about 55 plants) and small footprint, which make it ideal for tight spaces, such as apartment balconies; (2) its low cost (~110$) and container re-use; (3) its olla for efficient irrigation during hot, dry weather; (4) its relatively easy construction.
It does have one flaw, though. Can you spot it? Yes, i know it's ugly and a terracotta-colored barrel would look better, but that's not what i'm alluding to. There's always a shady side. Ah. So best to put shade-tolerant plants on that side, such as lettuces.
Two green thumbs up for now, and i'll report back in summer when the olla is working hard.