Concertina Trivet
The girlfriend has a neat, wooden, concertina trivet, that is, a collapsible object that goes between a hot pot and our dining table to protect the table from heat damage.
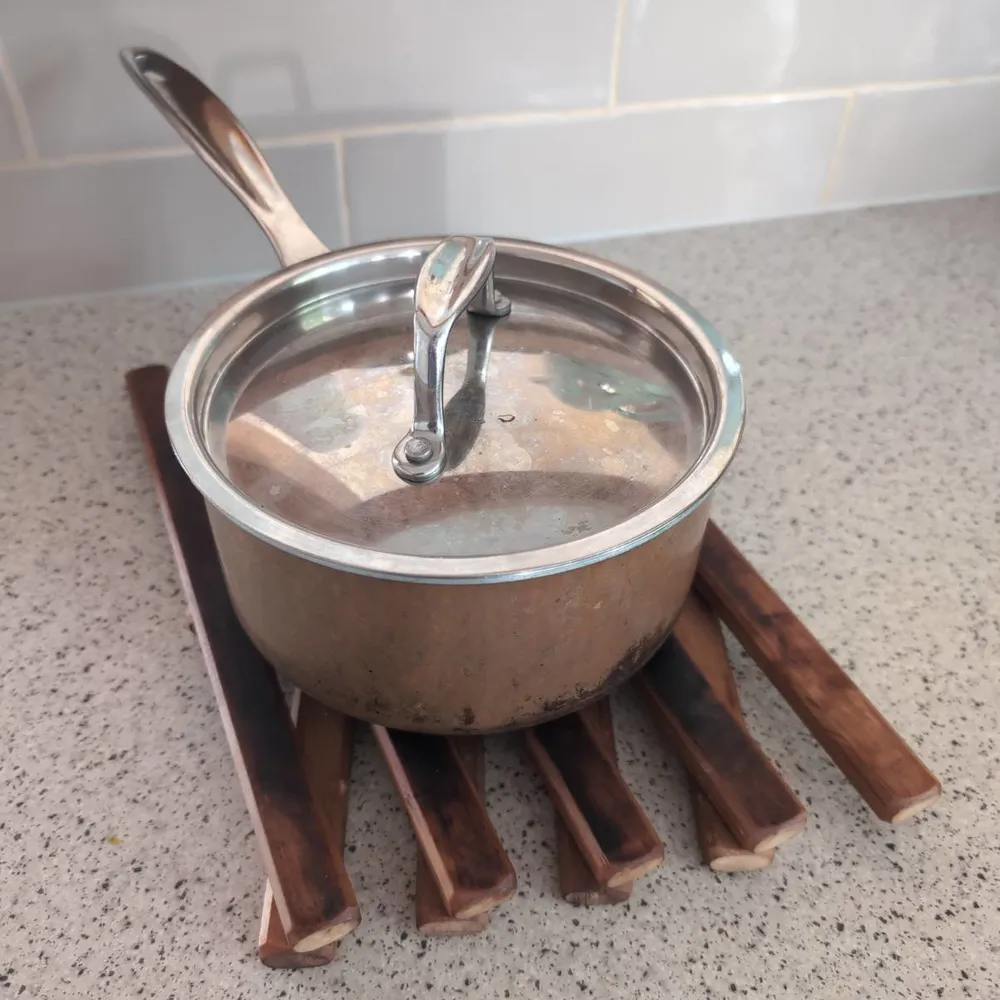
She bought it at a local craft fair several years ago, and we find it quite useful. I've copied the clever design several times now to make gift trivets for family and friends. Here's how i make them, in case you want to make one too.
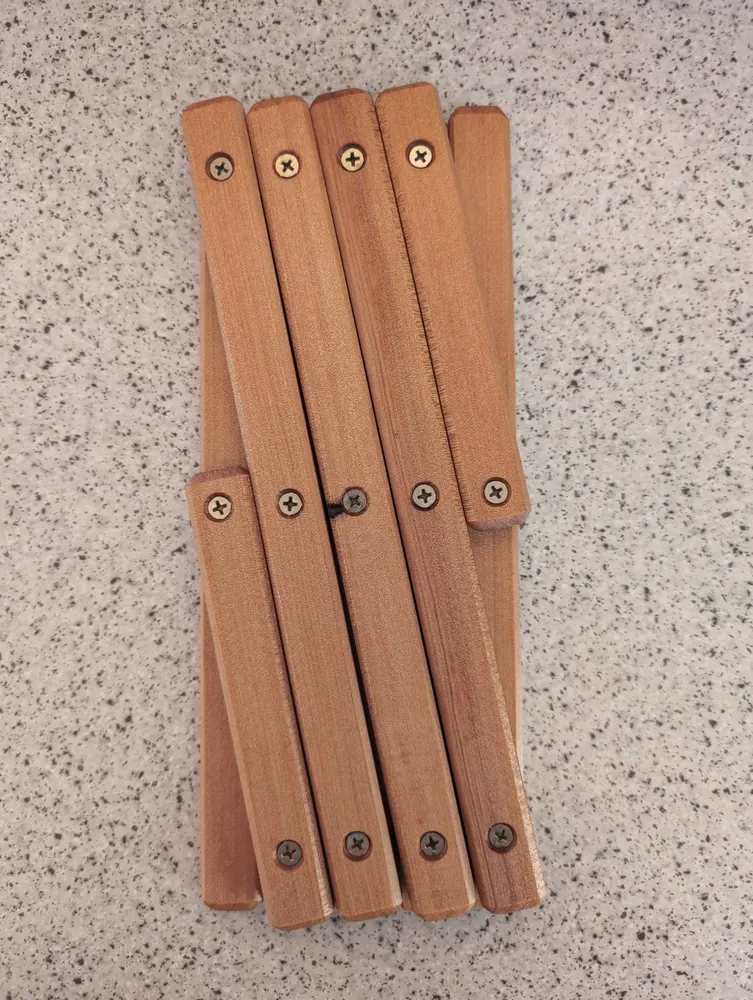
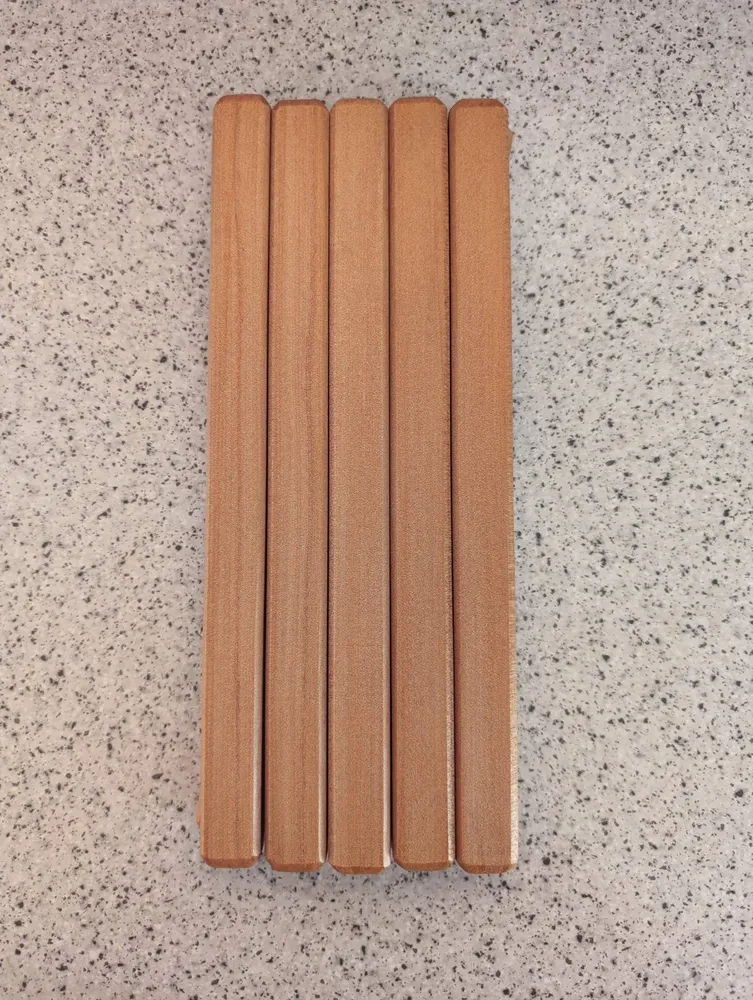
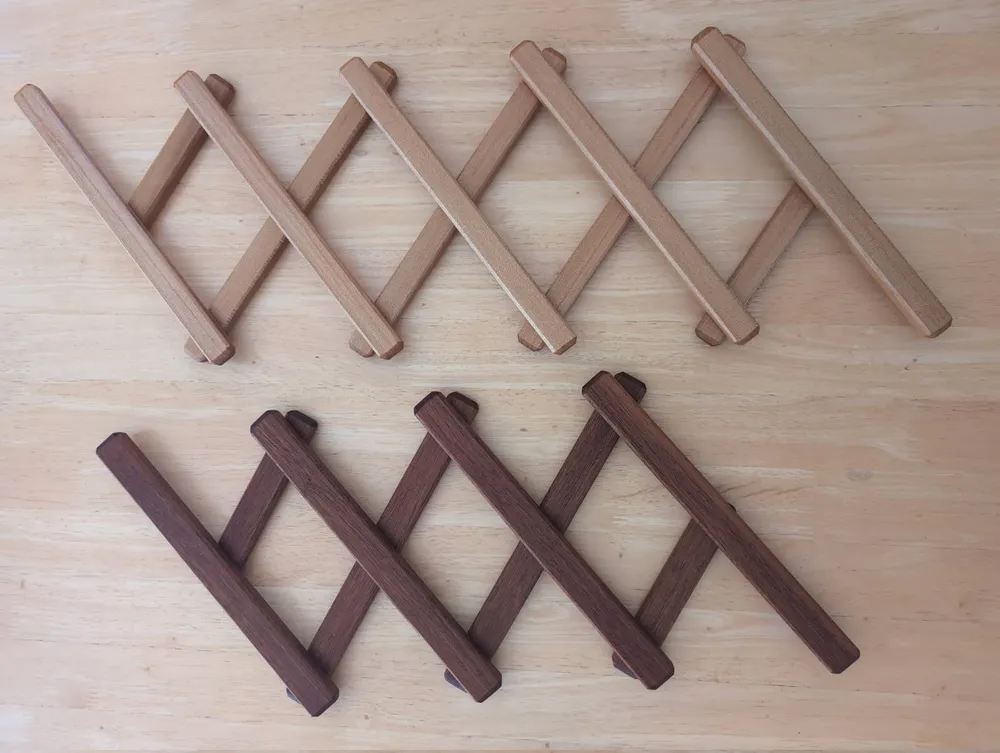
Basically, we'll screw five sticks into five other sticks as pictured here
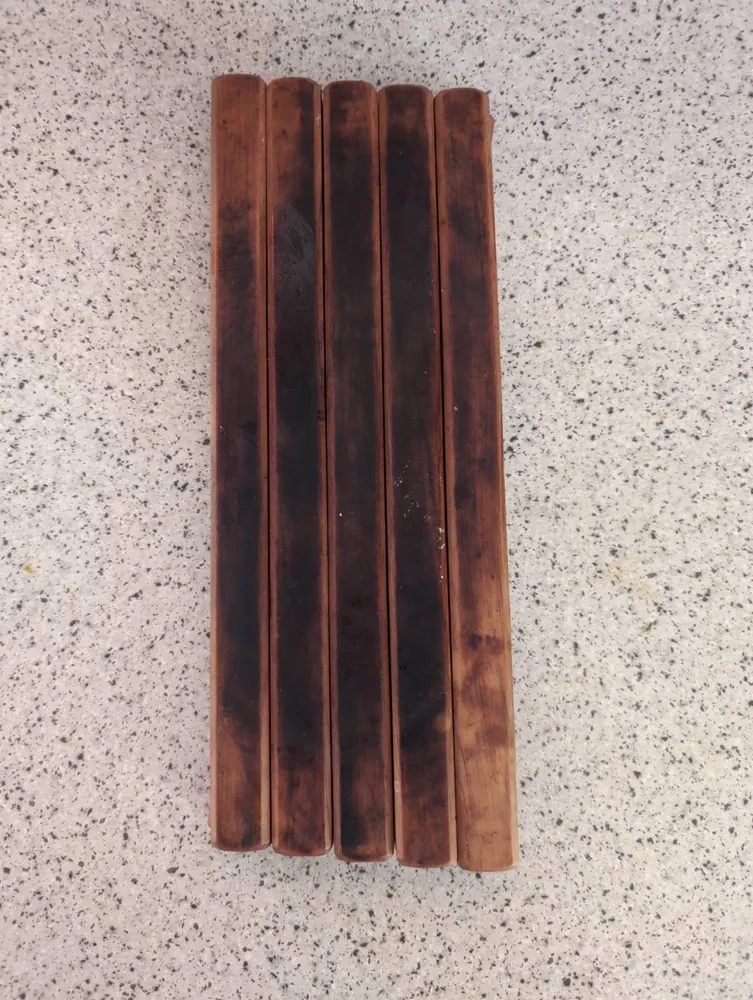
Original rimu wood trivet, top
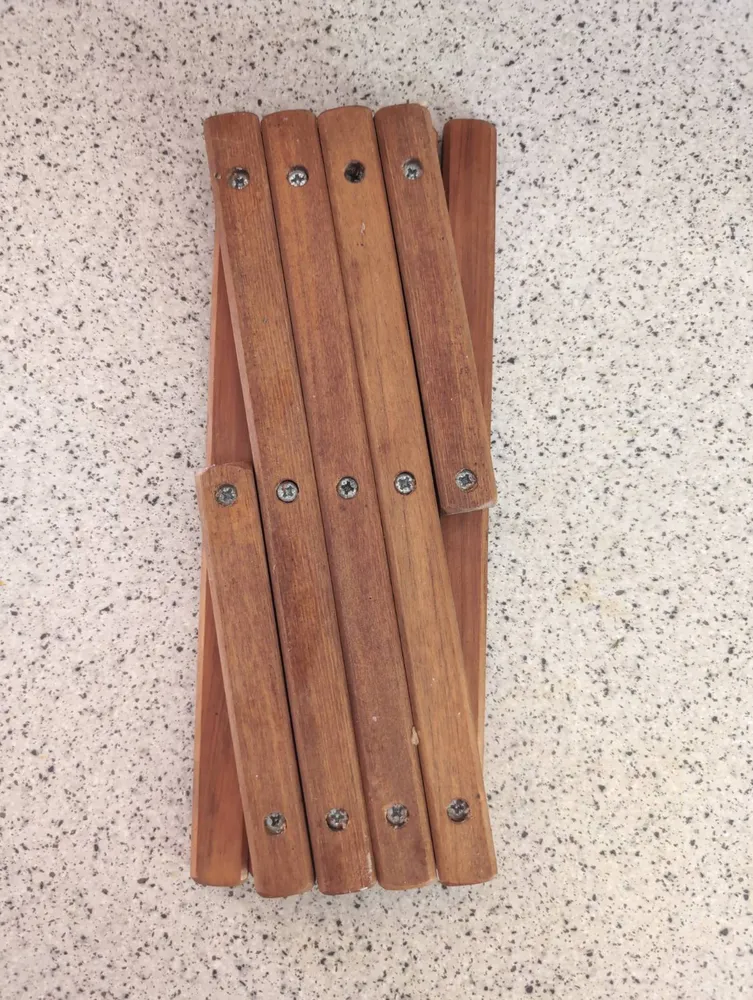
Original rimu wood trivet, bottom
and we'll ensure that the bottom sticks pivot on the screws fastened into the undersides of the top sticks without loosening those screws. Here we go.
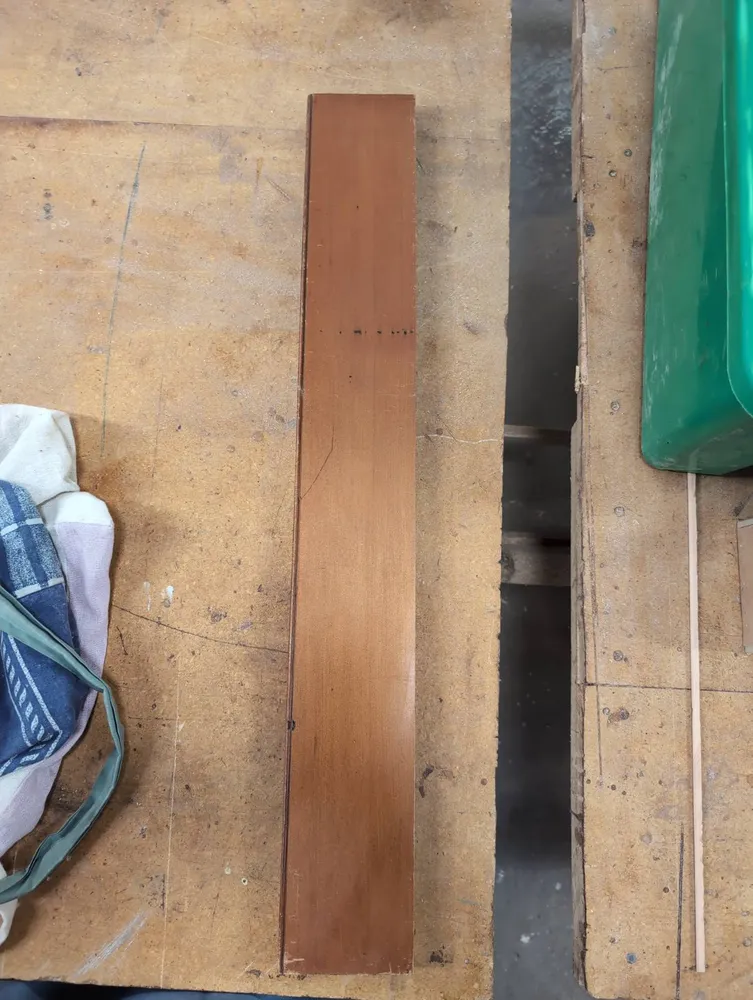
Pick some pretty wood and cut it into the sticks. I chose a piece of salvaged kauri for this example. Cut it down to ten sticks, each of size 280 mm (length) × 20 mm (width) × 13 mm (thickness).
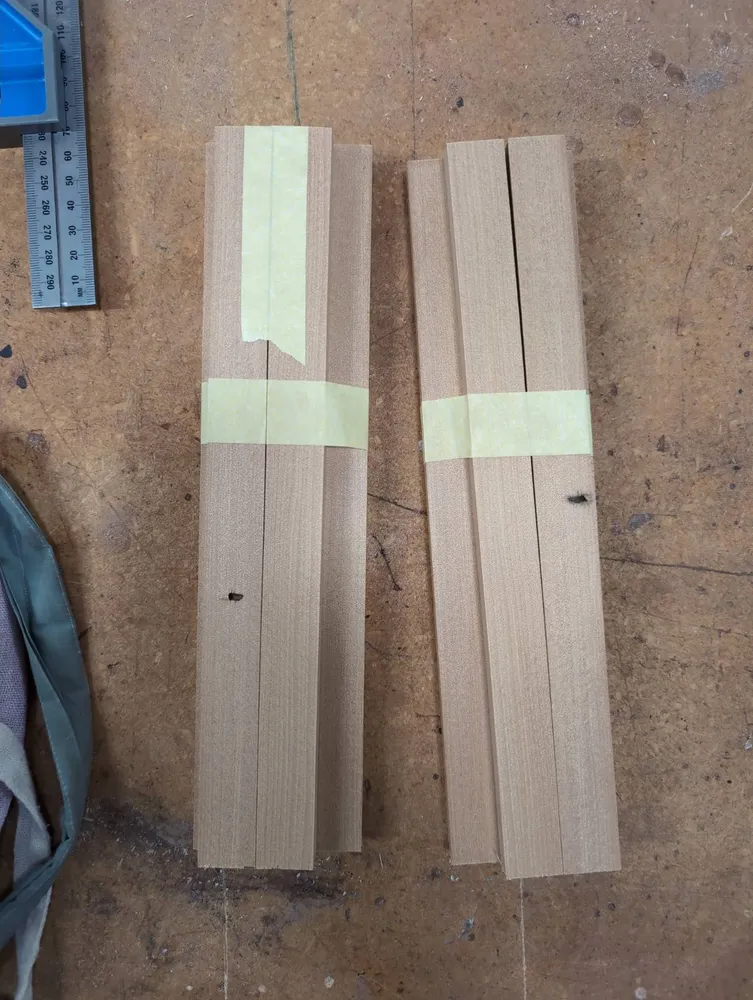
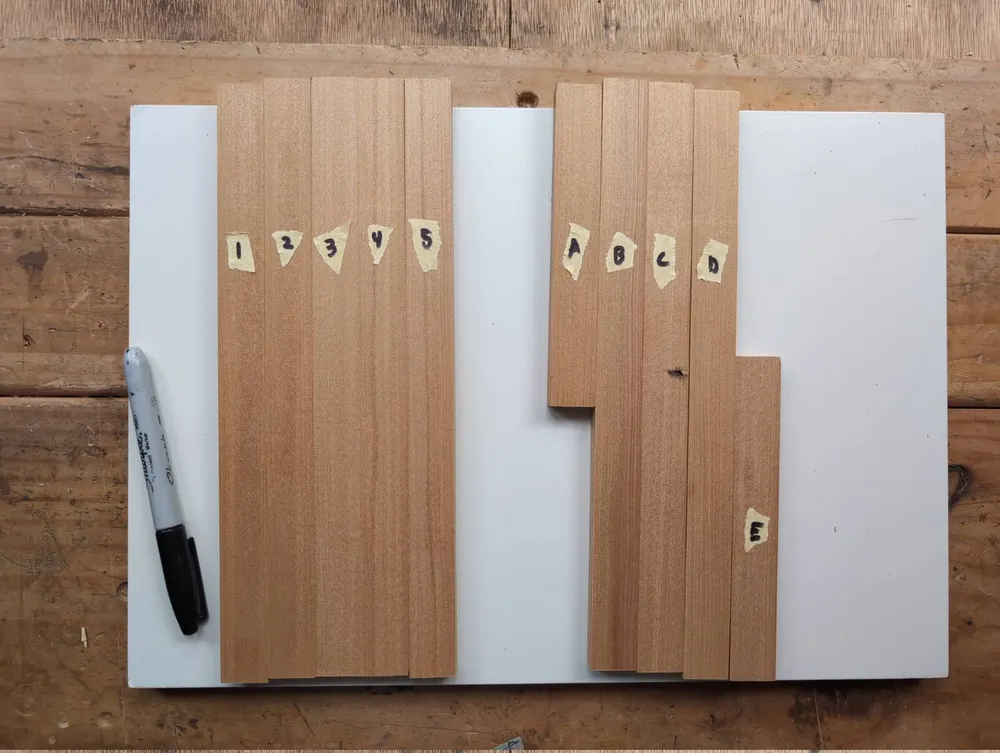
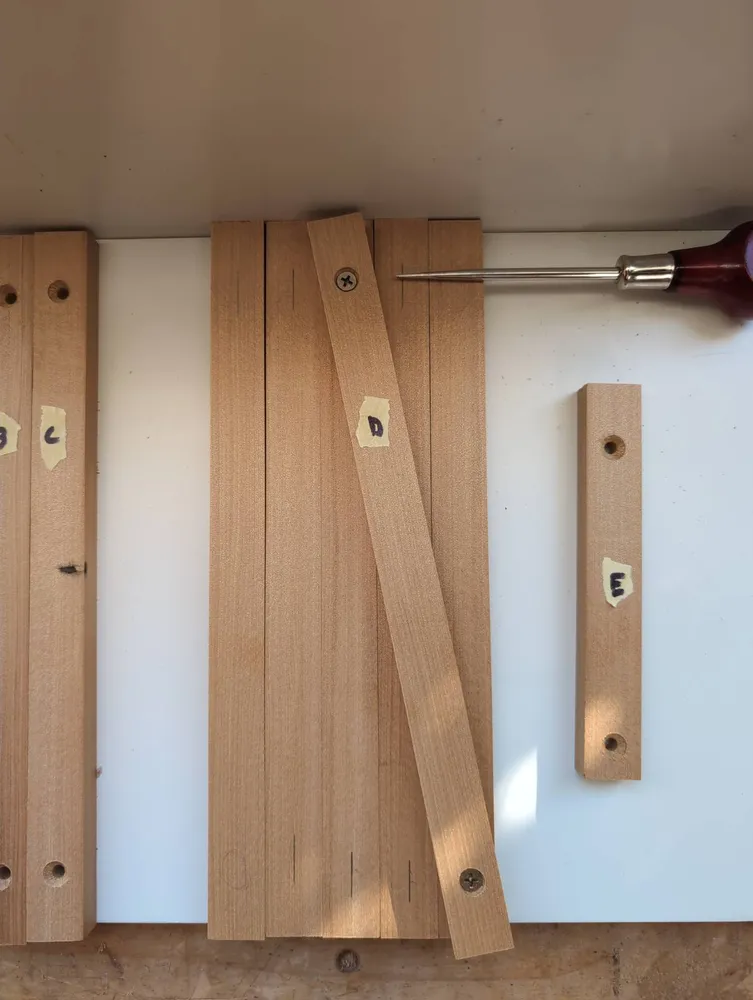
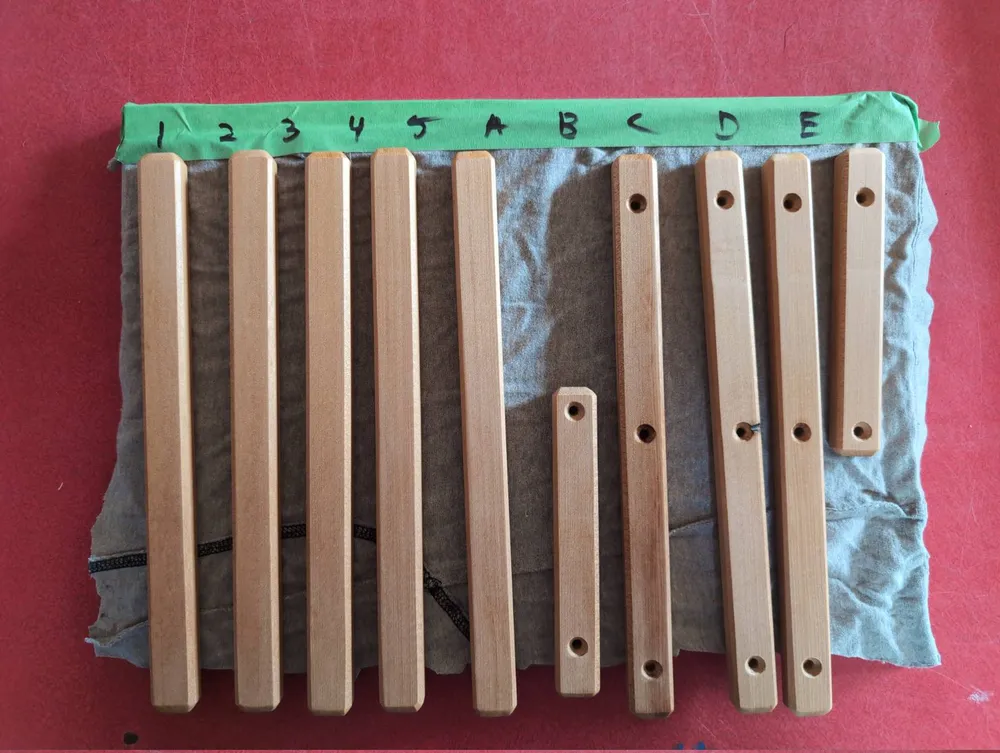
Arrange the sticks. Choose the five most handsome sticks for the top of the trivet, and leave the other five for the bottom. Cut the two ugliest bottom sticks down to 150 mm in length. Arrange the top sticks edge-to-edge in gapless fashion, and label them 1–5 on their show faces (top side of the trivet) with masking tape and marker. Do the same for the bottom sticks, and label them A–E on their show faces (bottow side of the trivet). Your labels record the final order and orientation of the sticks and will spare you great confusion during the build. Trust me on that.
Drill the bottom side holes. Get thirteen wood screws of appropriate size, e.g. 4 mm × 20 mm, and drill holes for them in the bottom sticks so that the threads don't bite, e.g. 5 mm holes. Drill three, laterally-centered holes into each of the three long sticks, one half way down, one 25 mm from one end, and one 25 mm from the other end. For each of the two short sticks, drill one laterally-centered hole 25 mm from one end and one 10 mm from the other (140 mm down the stick, i.e. the midpoint of a long stick). Countersink the holes on the show faces so that roughly 10 mm of screw protrudes through the non-show faces.
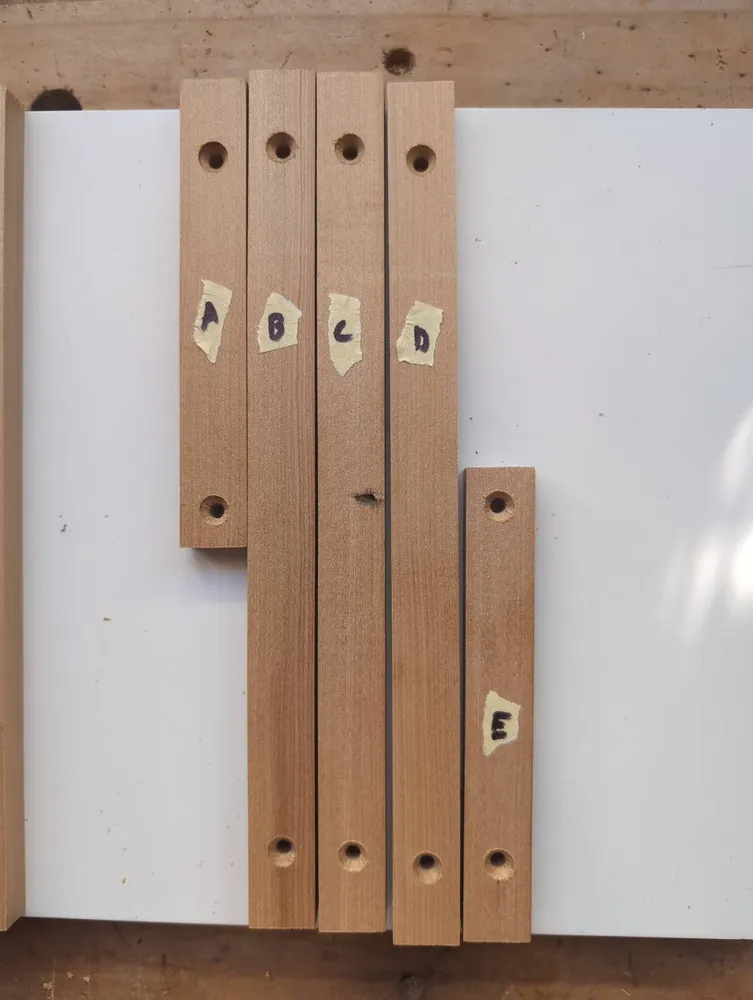
Whoops, i'm missing the center holes in this photo. Sorry.
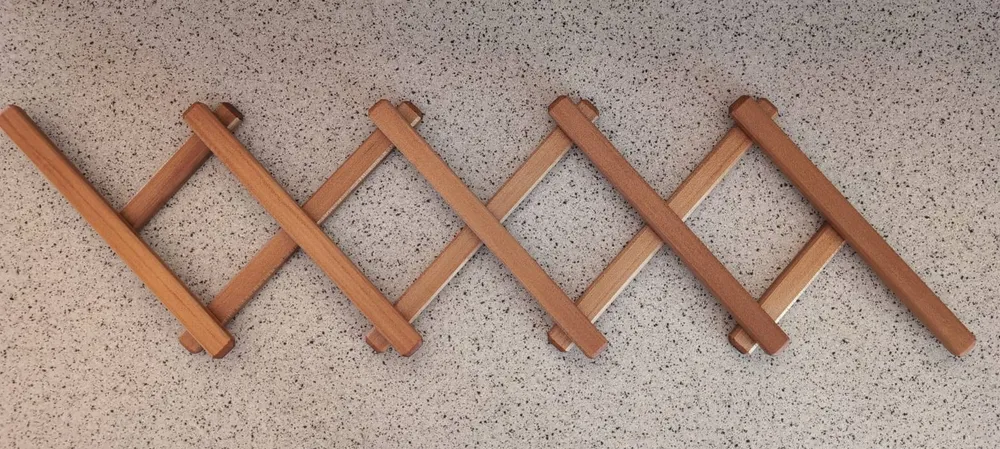
Drill the top side holes and screw. To get a gap-free top, we better transfer the bottom holes rather than measure and mark where they should be. To that end, place the top sticks show-face-down, ordered 1–5 from left to right when viewed from underneath (in your mind's eye or through a glass table). Lightly clamp them together. Place the bottom sticks show-face-up on top of them, ordered A–E from left to right (when viewed from above), and skew them like this:
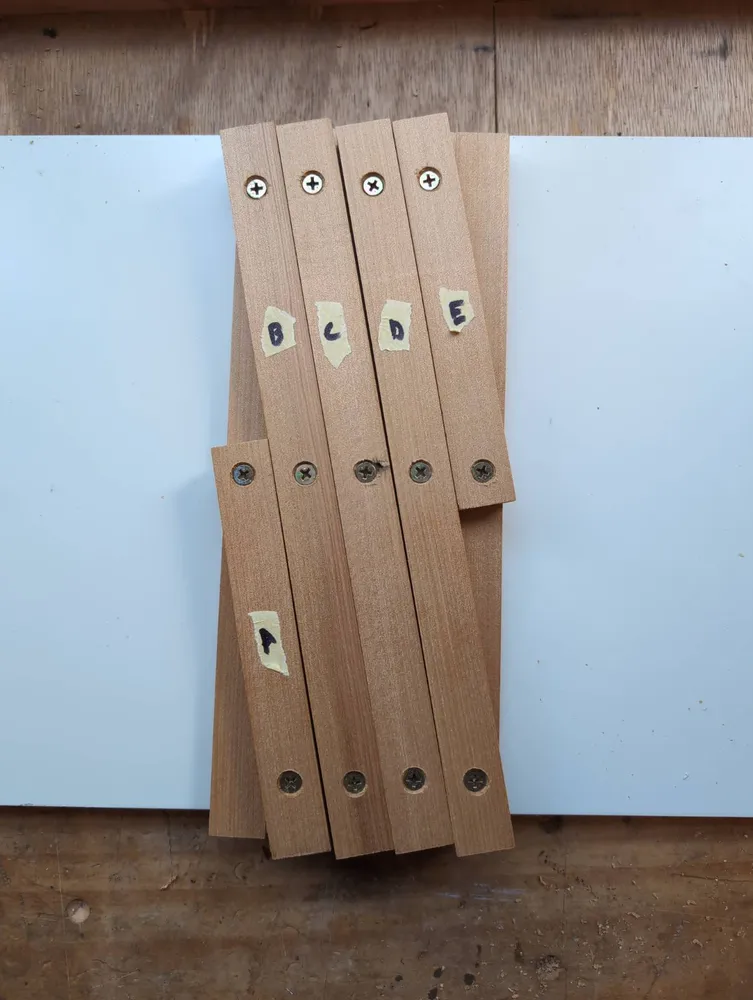
How to skew the sticks. I decided to invert sticks A and E to match the original rimu trivet, so we can both follow along better. Note that we haven't gotten to the screwing yet.
Starting with the left-most bottom stick, transfer with an awl its hole-centers to the corresponding top sticks, trying to hit the lateral centers of the top sticks. Follow these marks with pilot holes (e.g. 3 mm wide for 4 mm wide screws) going ~8 mm deep into the top sticks. Screw in the bottom stick. Repeat with the right-hand-neighboring bottom stick, trying not to create any gaps between the top sticks in the process, hence the clamp.
I'm marking the sticks out of order! Don't do this. Instead, do as i say above. Also, i should have had the center holes drilled at this point.
Repeat until you've screwed in all the bottom sticks, forming a rough, working trivet as in the photo two up from here.
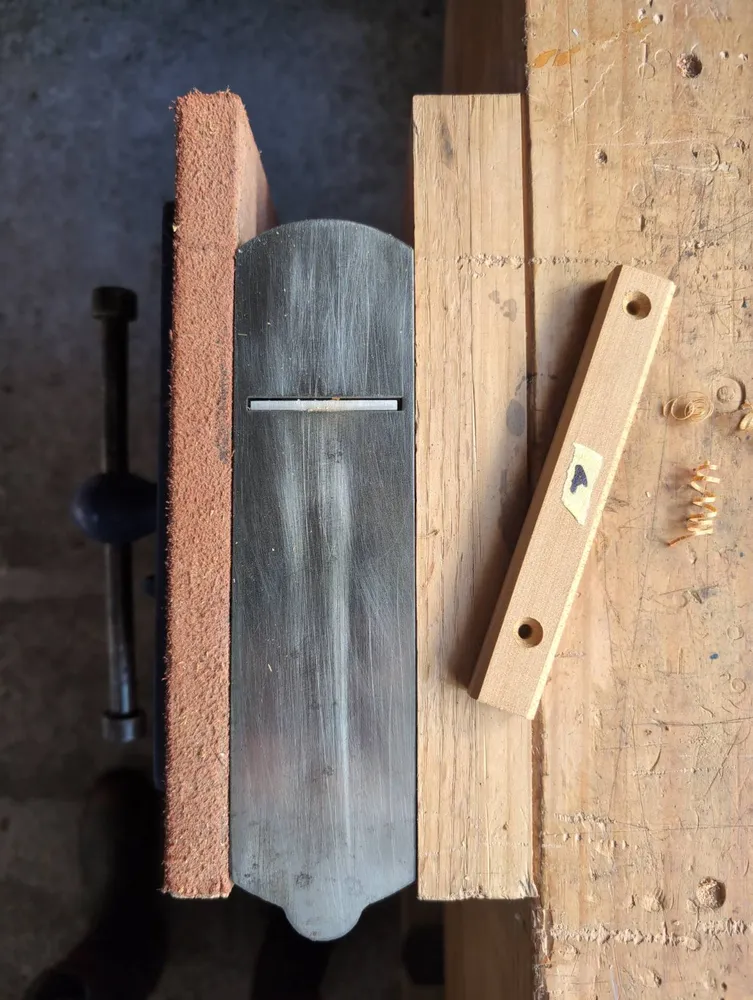
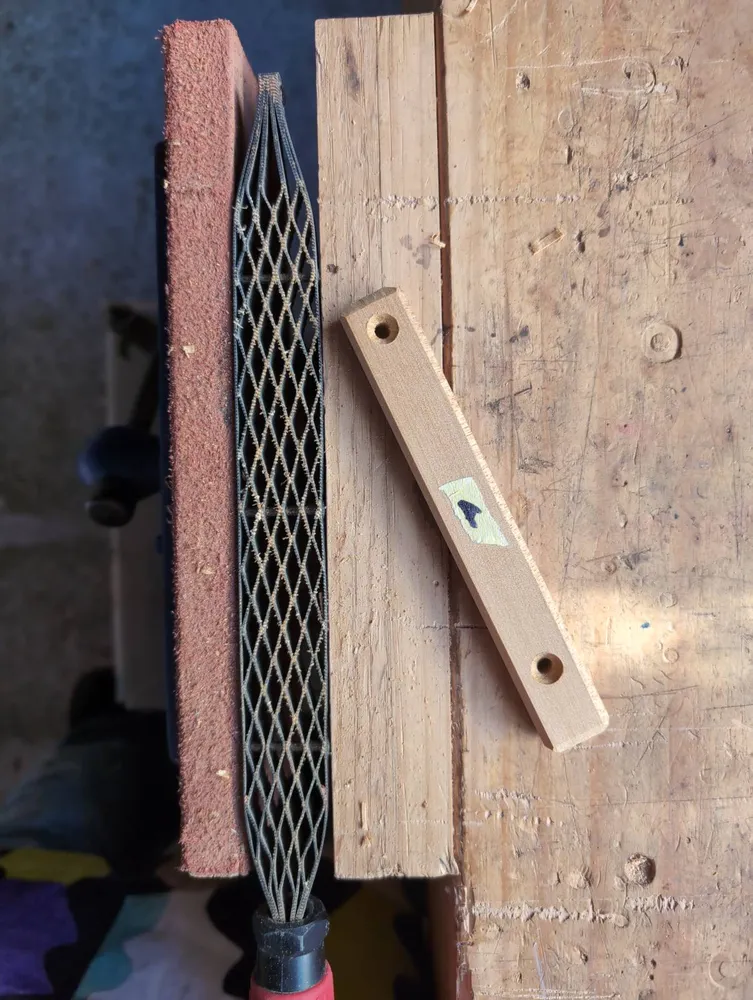
Chamfer. Disassemble trivet and chamfer the long edges of each stick, e.g. by running them across a plane held in a vice. Then chamfer the short edges of each stick with a rasp then 180-grit sand paper. You could also do this step before the previous step, if you like.
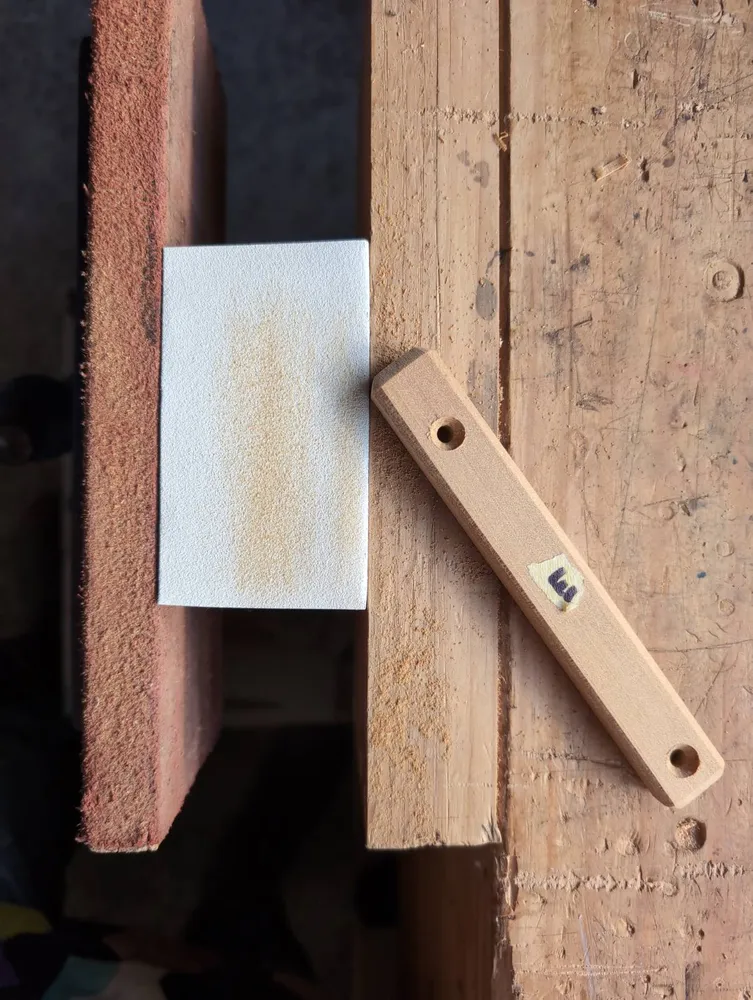
Prepare for finishing. Fine-sand any imperfections with 180- or 240-grit paper, wipe off the dust with a rag and white spirits, and transfer the sticks in their correct order and orientation to a clean, labeled board for finishing.
Finish. Finish the sticks with boiled linseed oil, let cure, then finish again with paste wax, all while preserving the sticks' correct order and orientation!
Reassemble. Reassemble the trivet, dabbing each screw tip with clear nail polish for extra (but still removable) grip, because we don't want the screws to turn as the trivet opens and closes. And here is where the labels pay off. Referring to them during reassembly allows you to match your idiosyncratically-aligned screw holes. Voilà!
Alternatively, you can make a 4 × 4 version, which is quicker to build and which i like to do with 25 mm wide sticks. It's shorter than the 5 × 5 version, but you can still fit at least two big pots on it.
880 mm vs 680 mm
The end. Now go singe the thing!
Why no comments? Public comments take too much time to moderate and maintain, time better spent playing outside, but you can still email me private comments by clicking the 'Comment' link above.